
Category: Seasonal Plants

  • “Manure for Plants: Nature’s Nutrient-Rich Gift”

    “Manure for Plants: Nature’s Nutrient-Rich Gift”

    Manure for Plants

    Manure, a natural and sustainable fertilizer, offers unparalleled benefits for plant growth and soil health. Derived from animal waste, it provides essential nutrients that plants crave. Rich in nitrogen, phosphorus, and potassium, manure boosts plant vitality and productivity. Composting Manure for Plants transforms it into a more usable form, enhancing its nutrient availability and reducing potential pathogens.

    Applying manure to your garden or farm improves soil structure, increases water retention, and promotes healthy root development. Manure’s organic matter fosters microbial activity, which aids in nutrient cycling and disease suppression. Different types of manure, like cow, horse, chicken, and rabbit, cater to various plant needs. For instance, chicken manure, high in nitrogen, suits leafy greens perfectly.

    Embracing manure as a fertilizer supports sustainable agriculture and gardening practices. It recycles waste, reduces reliance on synthetic fertilizers, and nurtures the soil naturally. By understanding and utilizing manure’s full potential, gardeners and farmers can cultivate thriving, healthy plants while promoting environmental stewardship. Let’s explore Manure for Plants: Nature’s Nutrient-Rich Gift by Zardens.


    Cow Manure

    Cow manure is a well-balanced, nutrient-rich fertilizer highly valued in gardening and agriculture. It contains nitrogen, phosphorus, and potassium, which are essential for plant growth. Additionally, cow manure is rich in organic matter, which improves soil structure and water retention. Before application, compost cow manure to reduce its high moisture content and odor. Composting also kills any potential pathogens and weed seeds, making it safer for use. Cow manure is versatile and can be used for a wide range of plants, from vegetables to flowers. Its slow-release nature ensures a steady supply of nutrients throughout the growing season. Incorporate cow manure into the soil before planting, and it will support robust root development and vigorous growth.

    Application Tips of Cow Manure

    1. Compost First: Compost cow manure before use. It reduces odor, kills pathogens, and improves nutrient availability for plants.
    2. Timing Matters: Apply composted manure in early spring or fall. It ensures nutrients are available when plants need them.
    3. Work into Soil: Incorporate manure into the topsoil. It prevents nutrient runoff, reduces odor, and improves soil structure.
    4. Avoid Fresh Manure: Fresh cow manure can burn plants. Always compost it to ensure safe application and optimal plant health.
    5. Uniform Application: Spread manure evenly. It ensures all plants receive adequate nutrients, promoting uniform growth across your garden.
    6. Use Appropriate Quantities: Apply the right amount. Too much manure can lead to nutrient imbalances and potential water pollution.
    7. Water After Application: Water the soil after applying manure. It helps nutrients penetrate the soil and reach plant roots efficiently.
    8. Monitor Soil pH: Regularly check soil pH. Cow manure can slightly alter pH levels, requiring occasional adjustments for optimal plant growth.
    9. Combine with Mulch: Use mulch alongside manure. It helps retain moisture, suppresses weeds, and further enriches the soil.
    10. Store Properly: Store unused manure in a covered, dry area. It prevents nutrient loss and contamination, ensuring it remains effective for future use.

    Benefits

    1. Nutrient-Rich: Cow manure provides essential nutrients like nitrogen, phosphorus, and potassium, vital for healthy plant growth.
    2. Improves Soil Structure: It enhances soil texture, making it easier for roots to penetrate and access nutrients and water.
    3. Increases Microbial Activity: Manure boosts beneficial soil microbes. These microbes help break down organic matter and cycle nutrients.
    4. Enhances Water Retention: It improves soil’s ability to retain water, reducing the need for frequent watering and promoting plant health.
    5. Sustainable Fertilizer: Using cow manure recycles farm waste. It reduces the reliance on synthetic fertilizers, promoting sustainable gardening practices.
    6. Organic Matter Addition: Adds valuable organic matter to the soil. It improves soil fertility and supports long-term plant health.
    7. Cost-Effective: Often cheaper than synthetic fertilizers. It provides an economical solution for enhancing garden productivity.
    8. Reduces Soil Erosion: Enhances soil structure, which helps prevent erosion, maintaining soil integrity and promoting plant stability.
    9. Natural Weed Control: Properly composted cow manure can suppress weed growth, reducing competition for nutrients with your plants.
    10. Eco-Friendly: Environmentally friendly fertilizer option. It promotes healthy ecosystems and reduces the carbon footprint of gardening.

    ✒️ "In fields where crops aspire to grow,
    Manure becomes the soil's best show.
    Its richness feeds the hungry land,
    Where plants stretch out their grateful hand"

    Horse Manure

    Horse manure is another excellent option for fertilizing plants, especially nitrogen-loving crops like corn and tomatoes. It is rich in nitrogen, which promotes leafy growth and overall plant vigor. However, horse manure often contains weed seeds, so composting is crucial to eliminate them. The composting process also stabilizes the nutrient content, making it more effective and safer for plants. Horse manure improves soil structure by increasing aeration and drainage, which is beneficial for heavy clay soils. Apply horse manure in the fall or early spring to allow it to break down before the growing season. This type of manure supports the healthy growth of garden plants, providing essential nutrients and improving soil health.

    Application Tips of Horse Manure

    Horse manure enriches garden soil with essential nutrients. Compost it first to kill weed seeds and pathogens effectively.

    1. Preparation: Mix horse manure with straw or bedding material for balanced composting. Turn the pile regularly for aeration.
    2. Composting Time: Allow the compost to mature for 6-12 months. This ensures nutrient availability and reduces potential plant burn.
    3. Soil Improvement: Incorporate composted horse manure into the topsoil. It improves soil structure, aeration, and moisture retention.
    4. Nutrient Boost: Horse manure is rich in nitrogen, which is essential for leafy plant growth. It’s ideal for heavy feeders like tomatoes.
    5. Application Timing: Apply manure in early spring or fall. This gives time for nutrients to integrate before planting season.
    6. Mulching: Use aged horse manure as mulch around plants. It suppresses weeds and gradually releases nutrients into the soil.
    7. Tea Preparation: Make manure tea by soaking horse manure in water. Use this liquid as a foliar spray for an immediate nutrient boost.
    8. Safety Precautions: Wear gloves when handling manure to prevent the spread of pathogens. Wash hands thoroughly after application.
    9. Odor Control: Properly composted horse manure has a reduced odor, making it pleasant to use in garden spaces.
    10. Eco-friendly: Using horse manure recycles waste, reducing reliance on synthetic fertilizers and supporting sustainable agriculture.

    Benefits

    Horse manure offers multiple advantages for gardeners. It boosts soil fertility and promotes healthy plant growth naturally.

    1. Nutrient-Rich: High in nitrogen, phosphorus, and potassium, horse manure provides essential nutrients for plants.
    2. Soil Structure: It improves soil texture, enhancing water retention and drainage capabilities simultaneously.
    3. Microbial Activity: Increases beneficial microbial populations in the soil, aiding in nutrient breakdown and disease suppression.
    4. Sustainable Practice: Recycles waste products into valuable soil amendments, reducing environmental impact and enhancing sustainability.
    5. Weed Control: When composted correctly, it suppresses weed growth, saving time and effort in garden maintenance.
    6. Plant Health: Encourages vigorous growth and higher yields in vegetables, fruits, and ornamental plants.

    Using horse manure effectively enhances your garden’s productivity and sustainability, promoting a healthier environment for plants and soil.


    Chicken Manure

    Chicken manure is one of the most nutrient-dense fertilizers available, particularly high in nitrogen. This makes it ideal for plants that require a significant nitrogen boost, such as leafy greens and vegetables. However, fresh chicken manure can be too strong and may burn plants, so it must be composted before use. Composting chicken manure reduces its potency and makes the nutrients more readily available to plants. Additionally, the composting process kills harmful pathogens, ensuring the manure is safe for the garden. Once composted, chicken manure provides a quick-release source of nutrients that can significantly enhance plant growth. Apply it to the soil before planting or use it as a top dressing during the growing season for the best results.

    Application Tips for Chicken Manure

    1. Composting: Always compost chicken manure before use. Fresh manure can burn plants due to high nitrogen content.
    2. Mix with Carbon-Rich Materials: Balance nitrogen by mixing manure with straw or leaves. This enhances composting and nutrient distribution.
    3. Apply in Fall: Spread composted manure in fall. This allows nutrients to integrate into the soil before spring planting.
    4. Use as a Soil Amendment: Incorporate composted chicken manure into garden soil to improve texture, fertility, and microbial activity.
    5. Liquid Manure: Create manure tea by soaking chicken manure in water. Dilute the liquid before using it as a foliar spray.
    6. Avoid Direct Contact: Keep manure away from plant stems and leaves. Direct contact can harm delicate plant tissues.
    7. Regular Testing: Test soil regularly to monitor nutrient levels. Adjust manure application based on soil test results.
    8. Moderation: Use chicken manure sparingly. Over-application can lead to nutrient imbalances and potential environmental issues.
    9. Safety Precautions: Wear gloves and wash hands thoroughly after handling chicken manure. This prevents potential health risks.
    10. Even Distribution: Spread manure evenly across the garden. Uneven application can cause nutrient hotspots and plant stress.

    Benefits

    1. Nutrient-Rich: Chicken manure provides essential nutrients like nitrogen, phosphorus, and potassium, promoting vigorous plant growth.
    2. Improves Soil Structure: Adds organic matter, enhancing soil texture, aeration, and water retention.
    3. Boosts Microbial Activity: Stimulates beneficial soil microbes that aid in nutrient cycling and disease suppression.
    4. Sustainable Fertilizer: Recycles waste from poultry farming, reducing reliance on synthetic fertilizers and promoting sustainability.
    5. Enhances Plant Health: Provides a balanced nutrient profile, resulting in healthier, more resilient plants.
    6. Increases Yield: Consistent use of chicken manure leads to higher crop yields and improved garden productivity.
    7. Organic Gardening: Ideal for organic gardening practices, aligning with natural and eco-friendly farming methods.
    8. Cost-Effective: Readily available and cost-effective, especially if sourced from local poultry farms.
    9. Environmentally Friendly: Reduces chemical runoff and pollution, supporting a healthier ecosystem.
    10. Long-Lasting Effects: Improves soil health over time, providing lasting benefits for future planting seasons.

    Rabbit Manure

    Rabbit manure stands out as an exceptional fertilizer due to its high nutrient content and ease of use. Unlike other manures, rabbit manure can be applied fresh without composting, as it does not burn plants. It is rich in nitrogen, phosphorus, and potassium, essential for healthy plant growth. Rabbit manure also contains beneficial microorganisms that enhance soil fertility and promote plant health. Its pellet form makes it easy to handle and spread evenly in the garden. Apply rabbit manure directly to the soil around plants or mix it into compost for added benefits. Its quick-release nature ensures that plants receive an immediate nutrient boost, supporting vigorous growth and abundant yields.

    Application Tips of Rabbit Manure

    1. Direct Use: Rabbit manure can be applied directly to plants without composting. It won’t burn plant roots.
    2. Composting: Mix rabbit manure with kitchen scraps and yard waste. This speeds up the composting process.
    3. Mulching: Spread rabbit manure around the base of plants. It conserves moisture and suppresses weeds effectively.
    4. Soil Amendment: Work rabbit manure into the soil. This improves soil structure and nutrient content.
    5. Manure Tea: Steep rabbit manure in water for a nutrient-rich liquid fertilizer. Use it for foliar feeding.

    Benefits

    1. High Nitrogen: Rabbit manure is rich in nitrogen, which promotes leafy green growth and overall plant health.
    2. Balanced Nutrients: It provides balanced nutrients, including phosphorus and potassium, essential for flowering and root development.
    3. Improves Soil Texture: Adds organic matter, improving soil aeration and water retention. It makes heavy soils more workable.
    4. Enhances Microbial Activity: Rabbit manure boosts beneficial microbial activity. This helps decompose organic matter and cycle nutrients.
    5. Sustainable Fertilizer: Rabbit manure is a renewable resource, reducing the need for synthetic fertilizers. It supports organic gardening practices.

    Rabbit manure is a gardener’s best friend. Its direct application, composting benefits, and nutrient-rich profile make it ideal for improving soil and plant health. Use rabbit manure to enhance your garden’s productivity, foster sustainable practices, and enjoy lush, healthy plants year-round. Whether you’re mulching, making manure tea, or enriching soil, rabbit manure is your go-to organic fertilizer.


    🌱“From humble dung to nature’s gift,
    Manure’s worth gives crops a lift.
    With every spread upon the earth,
    Plants thrive in their green rebirth.

    Green Manure

    Green manure is a practice where specific plants are grown and then plowed back into the soil to improve fertility and structure. It enriches soil with organic matter, enhances nutrient levels, suppresses weeds, and promotes beneficial microbial activity. This sustainable technique fosters healthier crops and reduces the need for synthetic fertilizers.

    Application

    1. Plant Selection: Choose nitrogen-fixing legumes like clover, alfalfa, or vetch for their ability to add nitrogen to the soil.
    2. Crop Rotation: Incorporate green manure crops into rotation schedules to break pest and disease cycles.
    3. Timing: Sow green manure in fall or early spring, allowing time for growth before incorporation.

    Benefits

    1. Soil Enrichment: Green manure adds organic matter, enhancing soil structure and water retention.
    2. Nutrient Boost: Nitrogen-fixing plants increase soil nitrogen levels, reducing the need for synthetic fertilizers.
    3. Weed Suppression: Dense growth of green manure crops shades out weeds, minimizing weed competition.
    4. Erosion Control: Root systems of green manure plants help prevent soil erosion, especially on sloping land.
    5. Cost Savings: Reduces reliance on external inputs like fertilizers, promoting economic sustainability.

    Green manure presents a win-win solution, enriching soil fertility while minimizing environmental impact and production costs. Embracing this practice signifies a step towards sustainable agriculture and a greener future.


    Manure for Plants

    Manure is organic, enhancing soil fertility and structure while promoting microbial activity, crucial for plant growth. It contains a diverse array of nutrients, including nitrogen, phosphorus, and potassium, in forms readily available to plants. Unlike synthetic fertilizers, manure improves soil health, reduces erosion, and increases water retention, leading to sustainable agriculture practices. Additionally, manure recycles organic waste, reducing environmental pollution and greenhouse gas emissions. Its use aligns with organic farming principles, supporting biodiversity and ecosystem resilience. Ultimately, choosing manure fosters healthier soils, promotes long-term sustainability, and contributes to a more balanced and resilient agricultural system.

    comparison chart detailing the characteristics

    CharacteristicCow ManureHorse ManureChicken ManureRabbit Manure
    Nutrient ContentModerate levels of nitrogen, phosphorus, and potassium. Rich in organic matter.Similar nutrient composition to cow manure, but may vary depending on diet.High in nitrogen, phosphorus, and potassium.High in nitrogen and phosphorus, lower in potassium. Rich in organic matter.
    OdorModerate to strong odor, especially when fresh.Strong odor, especially when fresh.Strong odor, especially when fresh.Minimal odor, especially when compared to other manures.
    TextureUsually moist and clumped, may contain bedding material.Variable texture depending on bedding and diet. Often contains straw or wood shavings.Often dry and granular, mixed with chicken bedding.Usually dry and granular, mixed with hay or straw.
    pH LevelSlightly alkaline.Slightly acidic to neutral.Variable, can be slightly acidic.Slightly acidic.
    Decomposition RateModerate.Moderate to fast.Fast.Fast.
    ApplicationRequires composting or aging before use to prevent burning plants due to high nitrogen content.Requires composting or aging, but can be applied fresh in small amounts.Can be applied fresh or composted.Can be applied fresh or composted.
    Weed SeedsMay contain some weed seeds, depending on feed and composting process.May contain weed seeds if not composted properly.May contain weed seeds.Generally free of weed seeds.
    PathogensMay contain pathogens such as E. coli and Salmonella, but composting reduces the risk.May contain pathogens, particularly if not composted properly.May contain pathogens such as E. coli and Salmonella, composting is essential.Less likely to contain harmful pathogens compared to other manures.

    This chart should give you a comprehensive overview of the characteristics of cow, horse, chicken, and rabbit manure, aiding in decision-making for agricultural or gardening purposes. Let’s explore Manure for Plants: Nature’s Nutrient-Rich Gift by Zardens.

    Subscribe to Zardens newsletter!

  • “King of Fruits” The Mango: India’s Golden Fruit
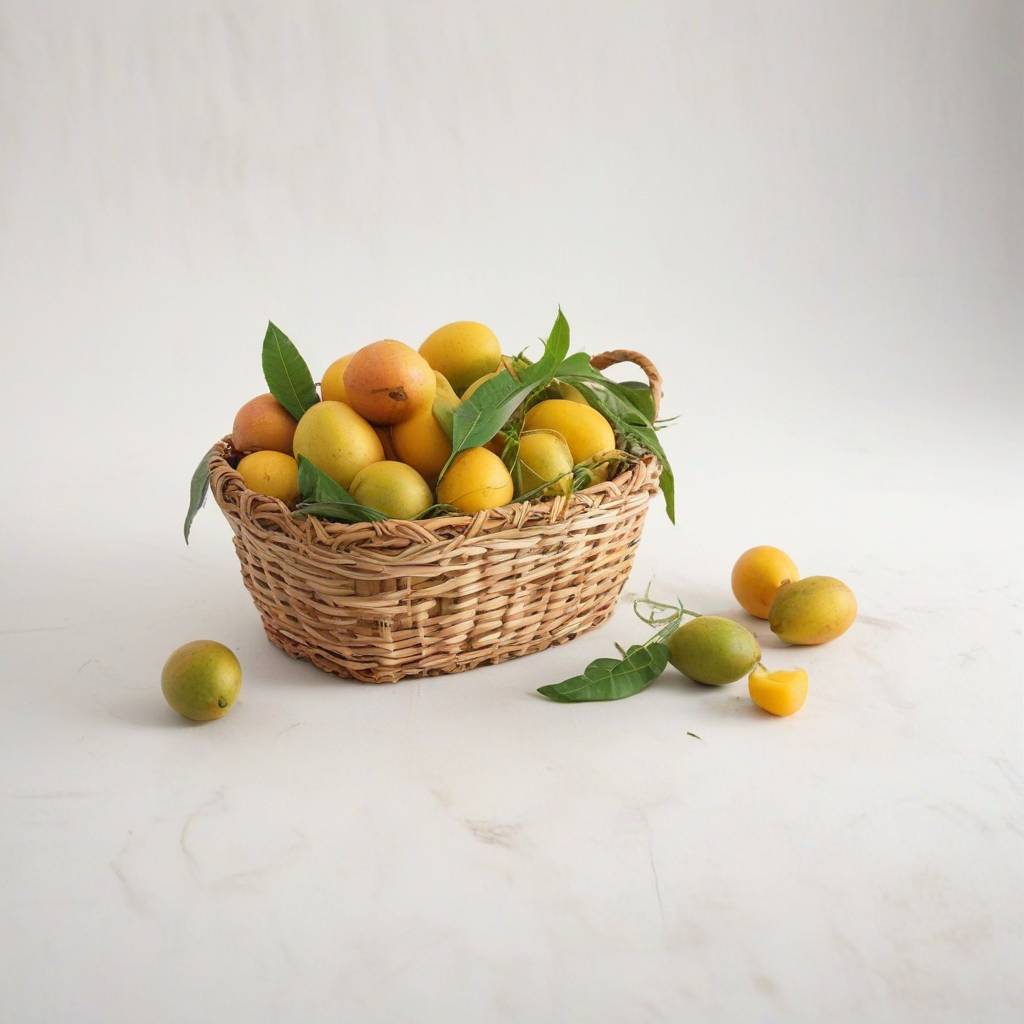
    “King of Fruits” The Mango: India’s Golden Fruit


    "Life is like a mango; it's sweetest when you savor every moment, even the ones with a hint of tanginess."
    

    The mango, often hailed as the “King of Fruits,” is a golden delight synonymous with Indian culture and heritage. India, often hailed as the land of mangoes, India’s Golden Fruit, boasts an impressive diversity of this luscious fruit. Mangoes, scientifically known as Mangifera indica, have been a symbol of prosperity, health, and indulgence in Indian culture for centuries. This comprehensive guide delves into the varieties, tastes, colors, climatic conditions for growth, benefits, uses, and preservation techniques of mangoes, ensuring you appreciate this king of fruits in all its glory. The mango’s journey from its origins in South Asia to its status as a globally beloved fruit is a testament to its versatility and appeal. Its history is deep and Sweet, Let’s explore it with Zardens.

    Origins and Early History

    • Ancient Beginnings: Mangoes (Mangifera indica) are believed to have originated in the region of South Asia. Specially in the areas of modern day India, Bangladesh, and Myanmar. Historical evidence suggests that mangoes have been cultivated in India for over 4,000 years.
    • Religious and Cultural Significance: In Hindu mythology, mangoes are associated with the gods and are considered a symbol of love and prosperity. The mango tree and its fruit are often mentioned in ancient Indian scriptures and texts.

    Spread Across Asia

    • Buddhist Influence: Buddhist monks are credited with introducing mangoes to other parts of Asia around the 4th and 5th centuries BC. They carried mango seeds with them as they traveled to places like Malaysia, the Philippines, and China.
    • Persian and Mughal Empires: The mango was a favorite fruit of the Persian and Mughal empires. In the 16th century, the Mughal Emperor Akbar is said to have planted over 100,000 mango trees in an orchard named Lakhi Bagh in eastern India.

    Introduction to Africa and the Middle East

    • Arab Traders: By the 10th century, Arab traders had introduced mangoes to the Middle East and East Africa. They played a significant role in the spread of the fruit through their extensive trade networks.

    European Exploration and Colonial Influence

    • Portuguese Arrival: The Portuguese, upon arriving in India in the 15th century, were captivated by the mango. They played a crucial role in introducing the Mango fruit to other parts of the world. Which are Brazil and West Africa, during their colonial expeditions.
    • Cultivation in the Americas: Mangoes were introduced to the Caribbean and Central America in the 18th century, primarily by the Portuguese and later by the Spanish.

    Modern Cultivation and Global Spread

    • 19th Century Onwards: In the 19th and 20th centuries, mangoes were introduced to the United States, particularly in Florida and Hawaii, as well as to other parts of the world like Australia and South Africa. Today, mangoes are grown in tropical and subtropical regions worldwide.
    • Global Popularity: Mangoes are now one of the most widely cultivated fruits in the tropics. India remains the largest producer of mangoes, but countries like China, Thailand, Indonesia, and Mexico also contribute significantly to global production.

    Cultural Impact

    • Culinary Uses: Mangoes are enjoyed in various forms – fresh, dried, in juices, and as part of numerous culinary dishes ranging from salads to desserts. Mango chutney, aam panna (a traditional Indian drink), and mango lassi (a popular yogurt-based beverage) are just a few examples.
    • Symbolism: The mango continues to be an important cultural and religious symbol in many countries. It features prominently in art, literature, and festivals, symbolizing love, fertility, and prosperity.

    Subscribe to our newsletter!


    King of Fruits, The Mango

    Variety: A Rainbow of Mangoes

    India is home to over a thousand varieties of mangoes, each with its unique flavor, texture, and aroma. Some of the most famous varieties include Alphonso, Kesar, Dasheri, Langra, and Himsagar.

    Alphonso (Hapus): Known as the king of mangoes, Alphonso is cherished for its rich, creamy texture and sweet, fragrant flavor. Predominantly grown in Maharashtra, it has a vibrant saffron-colored flesh.

    Kesar: Aptly named after the precious saffron spice, Kesar mangoes have a distinct sweet and tangy flavor. This variety, primarily grown in Gujarat, is celebrated for its bright orange flesh and heavenly aroma.

    Dasheri: Originating from the northern state of Uttar Pradesh, Dasheri mangoes are elongated with a greenish-yellow skin. They are known for their sweet and slightly tangy taste, making them a favorite for desserts and juices.

    Langra: This variety is famous in North India, particularly in Varanasi. Langra mangoes have a greenish skin even when ripe and a deliciously sweet and fibrous pulp.

    Himsagar: Grown in West Bengal and Odisha, Himsagar mangoes are fiberless and extremely sweet. Their bright yellow flesh makes them perfect for eating fresh and making into purees.

    Each of these varieties contributes to the vast mosaic of flavors and textures that mango lovers across India enjoy.

    Taste and Color: A Sensory Delight

    The taste and color of mangoes can vary significantly depending on the variety and region. Most mangoes have a combination of sweetness and tanginess, but the intensity of these flavors can differ.

    Taste: Alphonso mangoes, for instance, are known for their ultra-sweet and buttery taste, making them a premium choice. On the other hand, Langra mangoes have a subtle tartness that balances their sweetness, providing a refreshing contrast. The fibrous texture of Dasheri mangoes offers a chewy delight, while the juicy, melting flesh of Kesar and Himsagar mangoes make them a juicy indulgence.

    Color: The color spectrum of mangoes ranges from deep green to golden yellow to fiery orange. Alphonso mangoes are notable for their bright saffron hue, while Kesar mangoes boast a rich orange color. Dasheri and Langra mangoes maintain a greenish exterior even when ripe, hiding the vibrant yellow or orange flesh within. This visual appeal adds to the sensory experience of eating a mango, making it a feast for the eyes as well as the palate.

    Mangoes not only tantalize the taste buds but also offer a visual treat with their diverse colors and shapes, enhancing the overall experience of enjoying this fruit.

    Climatic Conditions: The Perfect Environment

    Mangoes thrive in tropical and subtropical climates, with India providing the ideal conditions for their cultivation. These conditions include:

    Temperature: Mango trees flourish in temperatures ranging between 24°C to 30°C. They require a warm climate to produce the best fruit, as extreme cold can damage the trees.

    Rainfall: Mangoes need moderate to heavy rainfall, typically between 75 cm to 250 cm annually. However, they also require a dry period during the flowering stage to ensure good fruit set and development.

    Soil: The trees prefer well-drained loamy or alluvial soil, rich in organic matter. Good drainage is crucial to prevent waterlogging, which can harm the roots.

    Sunlight: Full sun exposure is essential for the healthy growth of mango trees. They need plenty of sunlight to produce the energy required for flowering and fruiting.

    Regions like Maharashtra, Gujarat, Uttar Pradesh, West Bengal, and Andhra Pradesh provide these optimal conditions, making them prominent mango-growing areas in India. The interplay of these climatic factors ensures that Indian mangoes are of superior quality, known for their unparalleled taste and texture.

    Health Benefits: A Nutritional Powerhouse

    Mangoes are not just delicious but also packed with nutrients and health benefits. Here are some of the key health advantages of consuming mangoes:

    Rich in Vitamins: Mangoes are an excellent source of vitamins, particularly Vitamin C and Vitamin A. Vitamin C helps boost the immune system, while Vitamin A is crucial for eye health and skin.

    Antioxidants: Mangoes contain powerful antioxidants like beta-carotene, quercetin, and astragalin. These antioxidants help neutralize free radicals, reducing the risk of chronic diseases and promoting overall health.

    Fiber Content: The high fiber content in mangoes aids in digestion and helps prevent constipation. Dietary fiber is also beneficial for maintaining a healthy weight and reducing the risk of heart disease.

    Hydration: Mangoes have a high water content, making them an excellent fruit for hydration. Consuming mangoes can help replenish fluids and electrolytes, especially during the hot summer months.

    Skin Health: The vitamins and antioxidants in mangoes contribute to healthy, glowing skin. They can help reduce acne, delay signs of aging, and improve overall skin texture.

    Eye Health: Mangoes are rich in beta-carotene and Vitamin A, both of which are essential for maintaining good vision and preventing night blindness and dry eyes.

    Cancer Prevention: The antioxidants in mangoes, particularly quercetin, isoquercitrin, astragalin, fisetin, gallic acid, and methylgallat, have been shown to have cancer-preventing properties.

    Boosts Immunity: The high levels of Vitamin C, A, and carotenoids in mangoes help strengthen the immune system, protecting against infections and illnesses.

    Incorporating mangoes into your diet can provide a sweet and nutritious boost to your health, making them a perfect choice for a balanced diet.


    Uses: Culinary and Beyond

    King of Fruits, The Mango

    Mangoes are incredibly versatile and find their way into various culinary creations and other uses. Here are some popular ways mangoes are utilized:

    Fresh Consumption: The simplest and most popular way to enjoy mangoes is by eating them fresh. Sliced, diced, or just bitten into, fresh mangoes are a delightful treat.

    Mango Juice: Mango juice is a refreshing drink, especially popular in the summer. It can be enjoyed on its own or mixed with other fruits and beverages.

    Aamras: A traditional Indian delicacy, Aamras is a pulp made from ripe mangoes, often served with puris or chapatis. It is a staple in Gujarati and Maharashtrian cuisine.

    Lassi of Mango: This popular Indian drink combines yogurt, mango pulp, and sugar, creating a sweet and tangy beverage that’s perfect for cooling down on a hot day.

    Pickle from Mango: Raw mangoes are often used to make tangy and spicy pickles, which are a common accompaniment to Indian meals.

    Mango Chutney: Mango chutney is a sweet and spicy condiment made from ripe or raw mangoes, sugar, and spices. It’s a versatile addition to many dishes.

    Desserts: Mangoes are a popular ingredient in desserts like ice creams, sorbets, puddings, and cakes. They add a natural sweetness and vibrant color to any dessert.

    Salads: Mangoes can add a tropical twist to salads, pairing well with other fruits, vegetables, and proteins.

    Culinary Uses: Beyond these traditional uses, mangoes are also used in salsas, marinades, and sauces, adding a sweet and tangy flavor to various dishes.

    Cosmetics: The nutrients in mangoes, particularly Vitamin C and antioxidants, make them valuable in skincare products. Mango extracts are used in face masks, creams, and lotions to promote healthy, glowing skin.

    The versatility of mangoes makes them a beloved ingredient in kitchens and beyond, showcasing their immense popularity and utility.

    Preservation Techniques: Keeping Mangoes Fresh

    Preserving mangoes ensures that you can enjoy their delightful taste and nutritional benefits even when they are out of season. Here are some effective preservation techniques:

    Refrigeration: Ripe mangoes can be stored in the refrigerator for up to a week. Place them in a plastic bag or airtight container to retain their moisture and freshness.

    Freezing: Mangoes can be frozen for long-term storage. Peel and slice the mangoes, then spread the pieces on a baking sheet and freeze until solid. Transfer the frozen mango pieces to a freezer bag or container. Frozen mangoes can be used in smoothies, desserts, and sauces.

    Canning: Mangoes can be canned in syrup or as a puree. Sterilize canning jars, fill them with mango slices or puree, and cover with a sugar syrup or water. Process the jars in a hot water bath to ensure they are sealed properly. Canned mangoes can last up to a year.

    Drying: Dried mango slices make a delicious and portable snack. Slice the mangoes thinly and lay them on a drying rack or dehydrator. Dry them until they are leathery but still slightly pliable. Store the dried mangoes in an airtight container in a cool, dry place.

    Pickling: Mango pickles can be stored for months and add a tangy, spicy flavor to meals. The pickling process involves marinating raw mango pieces in a mixture of spices, salt, and oil, then storing them in sterilized jars.


    Mango Growing: An Overview

    Mango growing is a vibrant and rewarding agricultural endeavor, deeply rooted in tropical and subtropical regions worldwide. Known as the “king of fruits,” the mango (Mangifera indica) offers not only economic benefits but also nutritional and cultural significance. Successful mango cultivation requires an understanding of the tree’s biological needs, climate requirements, soil conditions, and effective pest and disease management.

    Climate and Soil Requirements

    Mango trees thrive in warm climates with a distinct dry season to induce flowering. They prefer temperatures between 24°C and 30°C, although they can tolerate higher temperatures. Frost is detrimental, often causing significant damage to flowers and young fruits. Therefore, regions with minimal risk of frost are ideal. Mangoes grow best in well-drained sandy loam soils rich in organic matter, with a pH range of 5.5 to 7.5. Poor drainage can lead to root rot, so proper soil preparation and site selection are critical.

    Planting and Care

    Propagation is commonly done through grafting to ensure quality and uniformity in fruit production. Seedlings are typically raised in nurseries before being transplanted to the field. Planting should be done at the onset of the rainy season to ensure adequate water supply during the initial growth phase. Spacing between trees is crucial, with recommended distances varying based on the variety and rootstock, usually between 8 to 10 meters apart to allow sufficient sunlight and air circulation.

    Regular care involves watering, especially during dry spells, and mulching to retain soil moisture and control weeds. Fertilization is essential, particularly nitrogen, phosphorus, and potassium, applied at different growth stages. Pruning helps maintain tree shape, remove dead or diseased branches, and improve air circulation, which is crucial in reducing fungal diseases.

    Pest and Disease Management

    Mango trees are susceptible to various pests and diseases, including mango hoppers, mealybugs, and anthracnose. Integrated pest management (IPM) strategies, combining biological control, chemical treatments, and cultural practices, are effective in mitigating these challenges. Regular monitoring and timely interventions can significantly reduce crop losses.

    Harvesting and Post-Harvest Handling

    Mangoes are typically harvested when they reach physiological maturity but are not fully ripe. This practice ensures they ripen evenly during transport and storage. Post-harvest handling includes careful harvesting to avoid bruising, cleaning, sorting, and packaging. Proper storage conditions, with temperatures around 13°C, help prolong shelf life and maintain fruit quality. Let’s explore it with Zardens.

    “The mango tree, with its branches spread out in all directions, looks like the hands of a dancer, adorned with the ornaments of flowers and fruits.”

    ✒️- Rabindranath Tagore


    Subscribe to our newsletter!

  • “Landscaping The Art of Beautifying”

    "Landscaping The Art of Beautifying"

    “Landscaping The Art of Beautifying”

    “In the tapestry of nature, landscaping is the artist’s brushstroke, transforming the mundane into a symphony of living beauty.”

    Landscaping is much more than just arranging plants. It’s the art of transforming outdoor spaces into breathtaking sanctuaries that blend nature with design. A garden where the vibrant hues of blooming flowers greet you. where the soft murmur of a water fountain calms your mind, This is the magic of Landscaping The Art of Beautifying.

    At its core, landscaping is about creating harmony between the natural environment and human-made elements. It involves a delicate balance of plant selection, terrain shaping, and the strategic placement of structures to enhance both aesthetics and functionality. Whether you’re working with a sprawling backyard or a compact urban plot, thoughtful landscaping can dramatically elevate the appeal and value of your property.

    Ultimately, landscaping is an artistic endeavor that marries creativity with nature. It’s about crafting a living canvas that evolves with time, reflecting the changing seasons and your personal style, transforming your outdoor space into a true masterpiece. Let’s Explore about it with Zardens.


    Landscape design styles

    Japanese Garden Style

    The Japanese garden style is renowned for its minimalist beauty and deep symbolism, embodying a sense of serenity and contemplation. Originating from the ancient Japanese tradition, this landscaping style emphasizes natural elements, asymmetry. The careful arrangement of rocks, water features, plants, and ornamental elements.

    Central to a Japanese garden is the concept of “shakkei” or borrowed scenery, means surrounding landscape into the garden design. This principle ensures that the garden appears larger and more connected to its environment. Another principle is “wabi-sabi,” beauty in imperfection and transience, Through weathered stones, aged wood, and the natural growth of plants.

    Rocks and stones play a significant role, symbolizing mountains or islands and creating focal points. These are carefully selected and positioned to create balance and harmony. Water features, such as ponds, streams, and waterfalls, are also vital, representing purity and the flow of life. Koi ponds are a common inclusion, adding movement and color.

    Plants in a Japanese garden are chosen for their seasonal beauty and symbolic meanings. Evergreens, such as pine trees, symbolize longevity and endurance. While flowering plants like cherry blossoms (sakura) represent the fleeting nature of life. Mosses and ferns add texture and a sense of age to the gardens.

    Pathways in Japanese gardens are designed to slow the visitor’s pace, encouraging mindfulness and reflection. Paths often feature stones, gravel, or wooden bridges, leading to various garden elements. The Zen garden, with its raked gravel and strategically placed rocks, serves as a space for meditation and contemplation.

    Subscribe to our newsletter!


    Mediterranean Garden Style

    The Mediterranean garden style, inspired by the landscapes of southern Europe, is characterized by its warm, inviting, and vibrant aesthetic. This style draws heavily from the regions of Italy, Greece, Spain, and southern France. Incorporating elements that thrive in dry, sunny climates and reflect the laid-back lifestyle of the Mediterranean.

    Central to a Mediterranean garden is the use of drought-tolerant plants. Olive trees, with their silvery leaves and gnarled trunks, are iconic to this style, symbolizing peace and abundance. Lavender, rosemary, and thyme are commonly used for their fragrant foliage and resilience, creating a sensory-rich environment. Bougainvillea, with its vibrant, cascading flowers, adds striking color and visual interest.

    The hardscaping in Mediterranean gardens often features natural materials like stone, terracotta, and wood. Stone walls, pathways, and patios create a rustic, timeless appeal, while terracotta pots and urns provide additional texture and warmth. These elements not only enhance the garden’s aesthetic but also help in retaining heat and promoting water conservation.

    Water features, though often simple, play a crucial role in Mediterranean gardens. Fountains and small pools provide a refreshing contrast to the arid surroundings and add a soothing auditory element. These features are typically constructed from natural stone or terracotta, blending seamlessly with the overall design.

    Outdoor living spaces are integral to the Mediterranean garden style, reflecting the region’s emphasis on alfresco dining and relaxation. Pergolas and arbors, often draped with climbing plants like grapevines or wisteria. Which provide shade and a picturesque setting for outdoor seating areas. These structures create inviting spaces for socializing and enjoying the garden’s beauty.


    Cottage Garden Style

    The cottage garden style, with its charming and informal aesthetic, harks back to the gardens of rural England. Characterized by dense plantings, an abundance of flowers, and a mix of edibles and ornamentals. This style exudes a romantic, whimsical appeal that feels both nostalgic and welcoming.

    At the heart of a cottage garden is its seemingly haphazard, yet thoughtfully planned, arrangement of plants. This style embraces a profusion of blooms and foliage, creating a tapestry of colors, textures, and scents. Traditional cottage garden plants include old-fashioned roses, hollyhocks, foxgloves, delphiniums, and lavender. These plants are chosen not only for their beauty but also for their ability to attract pollinators. Which helps is supporting a healthy and vibrant garden ecosystem.

    A hallmark of the cottage garden is its use of perennial borders, which provide structure and continuity throughout the seasons. These borders are often interspersed with annuals and biennials, adding variety and ensuring that there is always something in bloom. The mix of heights and forms, from tall spires to low-growing ground covers, creates a layered, naturalistic effect.

    Paths and walkways in a cottage garden are typically narrow and winding. Which lead visitors through the lush plantings and creating a sense of exploration and discovery. These paths are often made of gravel, brick, or stepping stones. Also may be edged with low hedges or flowering plants. The informal layout encourages a relaxed, leisurely experience, inviting visitors to stop and admire the beauty at every turn.

    Garden structures such as arbors, trellises, and pergolas are commonly used to support climbing plants like roses, clematis, and honeysuckle. These vertical elements add height and interest, as well as providing shade and creating cozy, enclosed spaces. Rustic materials, such as wood and wrought iron, are preferred to enhance the cottage garden’s quaint, old-world charm.

    "Through the hands of a landscaper, the raw canvas of the land becomes a masterpiece, whispering tales of serenity and splendor to all who wander through it."
    

    Modern Garden Style

    The modern garden style is defined by its clean lines, minimalist approach, and focus on functionality and aesthetics. This contemporary style emphasizes simplicity, order, and the harmonious integration of architecture and landscape. It is well-suited for urban environments and those who appreciate a sleek, uncluttered design.

    Central to the modern garden is the use of geometric shapes and well-defined spaces. This often involves the use of rectangular or square garden beds, paved areas, and water features. The layout is typically symmetrical or grid-like, creating a sense of order and balance. Hardscaping plays a significant role. With materials such as concrete, steel, and glass commonly used to create a modern, industrial look.

    Plants in a modern garden are chosen for their architectural qualities. Which has ability to complement the clean lines of the design. Ornamental grasses, succulents, and evergreens are popular choices, as they provide structure and texture without overwhelming the space. Plantings are often sparse and strategically placed to serve as focal points.

    Water features in modern gardens are sleek and understated. Often taking the form of reflecting pools, fountains, or waterfalls with a geometric design. These features add a sense of tranquility and can serve as focal points that draw the eye. The sound of moving water also enhances the overall sensory experience, providing a soothing backdrop to the minimalist setting.

    Outdoor living spaces are a key component, reflecting the modern emphasis on blending indoor and outdoor environments. Patios, decks, and terraces are designed as extensions of the home. Featuring contemporary furniture and amenities like fire pits, outdoor kitchens, and lounge areas. These spaces are often delineated by pergolas, screens, or built-in planters that add structure without clutter.

    Our Latest Posts


    Woodland Landscaping Style

    Woodland landscaping is inspired by the natural forests and woodlands. This style aims to create a serene, shaded environment that mimics the diversity and tranquility of a forest setting. It’s an excellent choice for large properties, especially those with natural tree cover.

    A woodland landscape typically features a canopy of mature trees, under which a variety of shade-loving plants thrive. The palette of plants includes native species such as ferns, hostas, and wildflowers. Which not only add to the authenticity of the woodland feel but also support local wildlife. Deciduous trees like oaks, maples, and beeches are often central to these landscapes. Providing a changing scenery through the seasons with their vibrant foliage.

    The design should incorporate layers of vegetation, with taller trees forming the upper layer. Smaller trees and large shrubs in the mid-layer, and groundcovers and perennials at the base. This layering mimics the natural structure of a forest but also provides a habitat for birds, insects, and other wildlife.

    Woodland landscapes are low-maintenance once established. As they primarily use native plants that are adapted to the local climate and soil conditions. Mulching with leaf litter or wood chips can help retain moisture and reduce weeds. This style particularly suitable for those who prefer a natural look.

    Overall, woodland landscaping is about creating a harmonious, natural space that provides a peaceful retreat and supports biodiversity. It is perfect for nature lovers and those looking to escape the hustle and bustle of urban life.


    Tropical Landscaping Style

    Tropical landscaping aims to create a lush, vibrant, and exotic environment that evokes the feel of a tropical paradise. This style is characterized by the use of bold, colorful plants, dramatic foliage. Which gives an overall sense of abundance and lushness.

    Key to tropical landscaping is the use of plants that thrive in warm, humid conditions. Palms, ferns, banana trees, and bird of paradise are staples. Providing the large, architectural leaves and bright flowers that define the look. These plants are often arranged in dense groupings to create a jungle-like atmosphere.

    Color is a crucial element in tropical landscapes. Flowers in vivid hues of red, orange, yellow, and purple are common. Ans with species such as hibiscus, bougainvillea, and heliconia making frequent appearances. These colors are set against a backdrop of deep green foliage, creating a striking visual contrast.

    Water features are integral to tropical landscapes, adding both visual interest and the soothing sound of water. Ponds, waterfalls, and streams can be included, often accompanied by aquatic plants like water lilies and lotus. These features help to enhance the feeling of being in a lush, tropical environment.

    Hardscaping in tropical gardens often includes materials like bamboo, teak, and natural stone, which complement the natural aesthetic. Pathways might be made from flagstone or pebbles, winding through the garden to create a sense of exploration and discovery.

    Tropical landscaping requires a bit more maintenance compared to other styles. Particularly in terms of watering and managing the rapid growth of plants. However, the result is a stunning, immersive environment that offers a daily escape to a vibrant, tropical paradise.


    Desert Landscaping Style

    Desert landscaping, also known as xeriscaping, is a style that embraces the unique beauty of arid environments. It focuses on using drought-tolerant plants and efficient water usage, making it both environmentally friendly and sustainable. In regions with limited water supply.

    The color palette in desert landscapes tends to be more subdued, with shades of green, gray, and brown dominating. However, bursts of color from flowering plants like ocotillo and desert willow can create striking contrasts. The effect is a harmonious blend of form and function, where each plant plays a specific role in the ecosystem.

    Hardscaping elements are integral to desert landscaping. These might include stone pathways, rock gardens, and raised beds made from natural materials. Boulders and rocks are frequently used to add structure and focal points, creating a sense of rugged beauty. Water features, while less common, can be designed to minimize water usage through recirculation and evaporation control.

    Overall, desert landscaping offers a unique blend of practicality and beauty. Creating a serene and sustainable environment that respects the natural limitations of its setting. It’s perfect for those looking to embrace an eco-friendly lifestyle without sacrificing aesthetic appeal.


    Prairie Landscaping Style

    Prairie landscaping is inspired by the vast, open grasslands of the North American prairie. This style emphasizes the use of native grasses, wildflowers. A naturalistic design that captures the essence of the prairie ecosystem. It is ideal for creating sustainable, low-maintenance landscapes that support local wildlife and promote biodiversity.

    The primary components of a prairie landscape are the grasses and wildflowers that define its character. Native grasses such as big bluestem, switchgrass, and little bluestem providing movement and texture throughout the year. These grasses are often interspersed with a variety of wildflowers like coneflowers, black-eyed Susans.

    Pathways in prairie gardens are usually informal and can be made from materials like gravel, wood chips, or stepping stones. These paths meander through the landscape, inviting exploration and providing access without disrupting the natural flow of the plants. Benches and seating areas can be placed along these paths, offering spots to sit and enjoy the surroundings.

    Hardscaping elements in prairie landscapes are typically understated and made from natural materials. Stone or wooden structures can provide focal points without overpowering the simplicity of the plantings.

    Prairie landscaping is an excellent choice for those looking to create a sustainable. Ecologically friendly garden that celebrates the beauty and resilience of native plants. It offers a dynamic and ever-changing landscape that provides habitat for wildlife and a serene, naturalistic space for human enjoyment.


    Formal Landscaping Style

    Formal landscaping is characterized by its structured, symmetrical design and meticulous attention to detail. This style is often associated with classic European gardens, where order, balance, and precision are paramount. It’s an ideal choice for those who appreciate a refined, elegant aesthetic.

    Key features of formal landscaping include geometric shapes, straight lines, and well-defined edges. Hedges and topiaries are used to create these shapes, often trimmed into precise forms such as spheres, cones, or cubes. Boxwood, yew, and privet are popular choices for plantings due to their dense foliage and ability to be easily shaped.

    Symmetry is a crucial element in formal gardens. Paths, flower beds, and plantings are arranged in mirror images, creating a balanced and harmonious look. Central focal points, such as fountains, statues, or ornamental trees draw the eye.

    The use of parterres, which are decorative garden beds arranged in intricate patterns, is another hallmark of formal landscaping. These beds are typically outlined with low hedges and filled with colorful annuals or perennials. Designs can range from simple geometric shapes to elaborate scrollwork. viewed from an elevated position to fully appreciate the pattern.

    Hardscaping in formal gardens is equally structured and elegant. Paved pathways made of stone, brick, or gravel lead through the garden, often bordered by hedges or low walls. These paths create clear lines.


    Landscaping The Art of Beautifying

    “Landscaping is the gentle art of creating harmony between earth and sky, crafting spaces where the spirit of nature dances freely.”

    Here’s a comparison chart of various landscaping design styles

    Design StyleCharacteristicsPlant SelectionFeatures & ElementsClimate Suitability
    JapaneseZen-like, minimalism, use of natural elementsJapanese maples, bamboo, cherry blossomsRock gardens, water features,Moderate to mild climates
    such as rocks, water, and plantsJapanese lanterns, bonsai trees
    FormalSymmetry, geometric shapes, manicured appearanceBoxwood, hedges, topiariesParterres, fountains, statuesVaried, adaptable
    Allees, pathways
    CottageInformal, whimsical, abundant plantingsRoses, daisies, lavender, hollyhocksClimbing vines, picket fencesVaried, adaptable
    Stone paths, birdhouses
    DesertXeriscaping, drought-tolerant plantsSucculents, cacti, desert shrubsGravel pathways, boulders,Arid, hot climates
    Adobe structures, sand gardens
    MediterraneanRelaxed, rustic, inspired by Southern EuropeLavender, olive trees, rosemaryTerra cotta pots, pergolas,Warm, dry climates
    Courtyards with mosaic tiles
    English GardenLush, romantic, dense plantingsRoses, hydrangeas, foxglovesHerbaceous borders, arbors,Temperate climates
    Winding pathways, hedges
    PrairieNaturalistic, grasses dominate the landscapeBig bluestem, prairie dropseedTallgrass meadows, butterflyTemperate to semi-arid
    gardens, native wildflowers
    TropicalLuxuriant, exotic, dense foliageOrchids, palms, ferns, heliconiasWaterfalls, ponds, hammocks,Warm, humid climates
    Thatched gazebos, bamboo
    WoodlandShaded, understory plants, naturalisticFerns, hostas, woodland wildflowersMoss-covered rocks, woodlandTemperate to cool climates
    paths, dappled sunlight
    Each landscaping style offers unique aesthetics, suited to different climates and personal preferences.

    “In conclusion, landscaping truly embodies the art of beautifying outdoor spaces. From meticulously planned gardens to thoughtfully designed hardscapes, every element contributes to creating a harmonious and visually stunning environment. Whether it’s enhancing curb appeal, fostering relaxation, or promoting biodiversity, landscaping offers endless possibilities for transforming ordinary spaces into extraordinary landscapes. So, whether you’re a homeowner looking to elevate your property or a landscape professional seeking inspiration, remember that landscaping is not just about plants and structures—it’s about creativity, passion, and the seamless integration of nature and design. Embrace the art of landscaping, and watch as your outdoor spaces come to life with beauty and charm.

    “Landscaping: The Art of Beautifying”

    This conclusion encapsulates the essence of landscaping as an art form and hints at its diverse applications and Design types . It emphasizes the creative aspect of landscaping while highlighting its ability to enhance both aesthetic appeal and functionality.

    Subscribe Zardens newsletter!

  • “Edible Plants for small garden” a rewarding experience!

    “Edible Plants for small garden” a rewarding experience!

    Edible Plants for small garden

    Creating a small edible garden is a delightful endeavor that not only adds charm to your outdoor space but also provides a source of fresh, nutritious produce right at your fingertips. Whether you have a sprawling backyard or just a tiny balcony, cultivating edible plants for a small garden is an accessible and rewarding pursuit for gardeners of all levels.

    In this exploration of edible plants for small gardens, we embark on a journey to discover the diverse array of vegetables, fruits, herbs, and edible flowers that thrive in confined spaces. From compact container gardens to vertical setups, the possibilities are endless for maximizing your green space and enjoying the fruits of your labor.

    One of the most appealing aspects of growing edible plants in a small garden is the opportunity to cultivate a variety of flavors and textures in a limited area. With strategic planning and thoughtful selection, you can create a mini oasis brimming with culinary delights, tailored to your taste preferences and culinary aspirations. Join Zardens as we unlock the secrets to creating a bountiful edible garden in even the smallest of spaces. Get ready to dig in, quite literally, and embark on a flavorful adventure that will nourish both body and soul.


    “Leafy Greens” Plants for small garden

    Lettuce (Lactuca sativa)

    Growing Tips: Lettuce is a cool-season crop that thrives in temperatures between 60-70°F (15-21°C). Plant seeds directly in the soil or start indoors 4-6 weeks before the last frost. Space plants about 6-12 inches apart in well-draining, fertile soil. Water consistently to keep the soil moist but not waterlogged. Lettuce grows well in full sun to partial shade.

    Care: Regularly thin seedlings to prevent overcrowding and ensure good air circulation. Apply a balanced, water-soluble fertilizer every few weeks. Watch for pests like aphids and slugs, and use organic remedies if necessary. Mulching around the base can help retain soil moisture and keep weeds at bay.

    Benefits: Lettuce is low in calories but high in vitamins A and K, making it a nutritious addition to your diet. It is also rich in antioxidants, which can help protect against chronic diseases.

    Medicinal Use: Traditionally, lettuce has been used for its mild sedative properties. The milky latex found in lettuce, called lactucarium, can act as a sleep aid and help reduce anxiety. Lettuce is also known for its anti-inflammatory properties, making it beneficial for reducing swelling and soothing skin irritations.

    Spinach 🥬

    Growing Tips: Spinach is a cool-season crop that thrives in spring and fall. Sow seeds directly into the garden as soon as the soil can be worked in spring, or start seeds indoors 4-6 weeks before transplanting. Plant seeds ½ inch deep and 2 inches apart in rows. Thin seedlings to 4-6 inches apart once they are a few inches tall. Spinach prefers well-draining, fertile soil with a pH of 6.5-7.0. Ensure it receives partial to full sun.

    CareKeep: the soil consistently moist but not soggy. Mulch around the plants to retain moisture and suppress weeds. Spinach grows quickly, so regular harvesting encourages more leaf production. Watch for common pests like aphids and leaf miners, and use organic methods like neem oil or insecticidal soap if needed.

    Benefits: Spinach is packed with nutrients, including vitamins A, C, and K, folate, iron, and calcium. It is low in calories and provides powerful antioxidants that support overall health. Spinach is also high in fiber, aiding digestion and promoting a healthy gut.

    Medicinal Use: Spinach’s high iron content helps combat anemia and fatigue. The antioxidants, particularly lutein and zeaxanthin, promote eye health and may reduce the risk of age-related macular degeneration. The nitrates in spinach can help lower blood pressure and improve heart health.

    Kale

    Growing Tips: Kale is a hardy, cool-season crop that can withstand frost. Plant seeds directly in the garden or start indoors 6-8 weeks before the last frost. Space plants 12-18 inches apart in full sun to partial shade. Kale prefers well-draining, loamy soil with a pH of 6.0-7.5.

    Care: Water kale consistently, keeping the soil evenly moist. Mulch around the base to retain moisture and reduce weeds. Fertilize with a balanced or nitrogen-rich fertilizer. Watch for pests like cabbage worms and aphids, and use organic pest control methods if needed.

    Benefits: Kale is a nutritional powerhouse, rich in vitamins A, C, and K, as well as calcium and antioxidants. It supports eye health, boosts the immune system, and promotes healthy bones.

    Medicinal Use: Kale contains anti-inflammatory compounds and antioxidants that help protect against chronic diseases. It also supports detoxification processes in the liver and has been linked to improved heart health due to its high fiber content and omega-3 fatty acids.

    Arugula

    Growing Tips: Arugula grows best in cool weather, so plant seeds in early spring or fall. Sow seeds 1/4 inch deep and 1 inch apart, thinning to 6 inches as they grow. Arugula prefers full sun to partial shade and well-draining, fertile soil.

    Care: Keep the soil consistently moist but not waterlogged. Arugula is a fast-growing crop, so you can harvest leaves as soon as they reach a usable size, usually within 4-6 weeks. Succession planting every 2-3 weeks will ensure a continuous supply.

    Benefits: Arugula is low in calories but high in vitamins A, C, and K, as well as calcium and folate. It has a distinctive peppery flavor that can add a nutritional boost to salads and other dishes.

    Medicinal Use: Arugula is known for its detoxifying properties, particularly for the liver. It contains glucosinolates, which help protect against cancer. Arugula also has anti-inflammatory properties and can aid in digestion due to its high fiber content.

    Swiss Chard

    Growing Tips: Swiss chard is a resilient, easy-to-grow leafy green that can thrive in small gardens. Plant the seeds directly in the soil about 1/2 inch deep and 2-4 inches apart. It prefers well-drained, fertile soil and full sun but can tolerate partial shade. Water consistently to keep the soil moist but not waterlogged. Mulch around the plants to retain moisture and suppress weeds. Thin seedlings to about 6-12 inches apart to allow for proper growth. Swiss chard can be harvested continually by picking outer leaves, allowing the center to keep producing.

    Care: Regular watering is essential, especially during dry periods. Swiss chard benefits from occasional feeding with a balanced fertilizer or compost tea. Keep an eye out for pests such as aphids and leaf miners, and treat with organic insecticidal soap if necessary. Remove any damaged or yellowing leaves to encourage new growth and prevent disease.

    Benefits: Swiss chard is packed with nutrients, including vitamins A, C, and K, magnesium, and iron. It’s a versatile vegetable that can be used in salads, soups, stir-fries, and as a spinach substitute in most recipes. The colorful stems add a vibrant touch to dishes and the garden.

    Medicinal Uses: Swiss chard is known for its anti-inflammatory properties due to its high concentration of antioxidants like beta-carotene and lutein. It’s also beneficial for bone health because of its vitamin K content. Swiss chard helps regulate blood sugar levels due to its syringic acid content, which has shown potential in supporting diabetic health.

    Mustard Greens 🌿

    Growing Tips: Mustard greens are fast-growing and ideal for small gardens. Sow the seeds directly into the soil about 1/4 inch deep and 1 inch apart. They thrive in cool weather, so plant them in early spring or late summer. Ensure the soil is rich, well-drained, and kept consistently moist. Mustard greens prefer full sun but can tolerate partial shade. Thin the seedlings to 6-8 inches apart to promote healthy growth.

    Care: Water mustard greens regularly, especially during dry spells, to keep the soil evenly moist. Mulch around the plants to retain moisture and control weeds. Fertilize with a balanced organic fertilizer or compost. Watch for pests like flea beetles and aphids, and use organic methods to control them. Regularly harvest the outer leaves to encourage new growth and prevent bolting, especially in warm weather.

    Benefits: Mustard greens are nutrient-dense, offering high levels of vitamins A, C, and K, as well as calcium and fiber. They add a spicy kick to salads, soups, and stir-fries, and can be used as a cooked green in various dishes. Their bold flavor enhances many recipes, making them a valuable addition to your garden.

    Medicinal Uses: Mustard greens are rich in antioxidants, which help combat oxidative stress and inflammation. They have detoxifying properties, aiding liver function and supporting overall body detoxification. High in fiber, mustard greens contribute to digestive health and regularity. Their glucosinolate content has been linked to cancer prevention, making them a powerful addition to a healthy diet.


    Subscribe to our newsletter!

    “Herbs” Plants for small garden

    Basil

    Growing Tips: Basil thrives in warm, sunny conditions and well-draining soil. Plant basil in a location that receives at least 6-8 hours of sunlight daily. If growing indoors, place the pot near a south-facing window. Basil seeds can be started indoors 6-8 weeks before the last frost or sown directly into the garden after the danger of frost has passed. Space the plants about 12 inches apart to allow for proper air circulation. Regularly pinch off the tops of the plants to encourage bushier growth and prevent flowering, which can make the leaves bitter.

    Care: Water basil regularly, keeping the soil consistently moist but not waterlogged. Mulch around the plants to retain moisture and suppress weeds. Fertilize every 4-6 weeks with a balanced, organic fertilizer. Watch for pests such as aphids and treat them with insecticidal soap if necessary. Harvest leaves by pinching them off, starting from the top to promote further growth.

    Benefits: Basil is rich in vitamins A, C, and K, as well as minerals like magnesium, iron, and calcium. It has antioxidant properties that help fight free radicals and support overall health. Adding basil to your diet can enhance flavor without adding calories, making it an excellent choice for healthy eating.

    Medicinal Use: Basil has been used traditionally to alleviate various ailments. It contains essential oils like eugenol, which have anti-inflammatory and antibacterial properties. Basil tea can soothe indigestion and relieve stress. The leaves can be applied topically to insect bites or cuts to reduce inflammation and promote healing. Consuming basil regularly may also help manage blood sugar levels and improve cardiovascular health.

    Parsley 🍀

    Growing Tips: Parsley prefers a location with partial shade to full sun and well-draining soil rich in organic matter. Sow parsley seeds directly into the garden or start them indoors 8-10 weeks before the last frost. Soak seeds overnight to speed up germination. Plant seeds about 1/4 inch deep and thin seedlings to stand 6-8 inches apart. Parsley can also be grown in pots or window boxes, making it ideal for small spaces.

    Care: Keep the soil evenly moist, but avoid waterlogging. Mulching helps retain soil moisture and control weeds. Fertilize every 4-6 weeks with a balanced fertilizer. Regularly trim the outer leaves to encourage continuous growth and prevent bolting. Parsley is relatively pest-free but watch for aphids and treat them with insecticidal soap if necessary.

    Benefits: Parsley is a powerhouse of nutrients, including vitamins A, C, and K, as well as iron, magnesium, and calcium. It acts as a natural diuretic, aiding in kidney health and reducing water retention. Parsley can also help freshen breath and support digestion.

    Medicinal Use: Parsley has been used in traditional medicine for its diuretic properties, helping to flush out excess fluid from the body and support kidney function. It is also known for its anti-inflammatory properties, which can help alleviate symptoms of arthritis and other inflammatory conditions. Chewing on parsley leaves can freshen breath and aid in digestion. Additionally, parsley tea is used to relieve bloating and promote a healthy menstrual cycle.

    Cilantro 🥬

    Growing Tips: Cilantro prefers cool weather and well-drained soil with plenty of organic matter. Sow seeds directly in the garden after the last frost or in late summer for a fall harvest. Plant seeds about 1/4 inch deep and thin seedlings to 6 inches apart. Cilantro grows well in containers, making it perfect for small gardens. Ensure the plant receives 4-6 hours of sunlight daily.

    Care: Water cilantro regularly, keeping the soil consistently moist but not soggy. Mulch around the plants to retain moisture and suppress weeds. Cilantro bolts quickly in hot weather, so harvest leaves frequently to encourage new growth. Use a balanced fertilizer every 4-6 weeks. Watch for pests like aphids and treat with insecticidal soap if needed.

    Benefits: Cilantro is rich in vitamins A, C, and K, and minerals like potassium, calcium, and magnesium. It has antioxidant properties that help protect cells from damage. Adding cilantro to your diet can enhance the flavor of dishes and provide numerous health benefits.

    Medicinal Use: Cilantro is known for its detoxifying properties, helping to remove heavy metals from the body. It has antimicrobial properties that can help fight infections. Cilantro can also aid in digestion and relieve symptoms of indigestion, bloating, and gas. Its anti-inflammatory properties make it useful in managing arthritis and other inflammatory conditions. Cilantro tea can be used to promote restful sleep and reduce anxiety.

    Mint 🌱

    Growing Tips: Mint is a hardy perennial that thrives in moist, well-drained soil and partial shade to full sun. It can be grown from seeds, cuttings, or transplants. Due to its invasive nature, it’s best to plant mint in containers to control its spread. Place containers in a location that receives 4-6 hours of sunlight daily. Mint prefers slightly acidic to neutral soil (pH 6.0-7.0).

    Care: Water mint regularly to keep the soil evenly moist. Fertilize every 4-6 weeks with a balanced, water-soluble fertilizer. Prune the plant frequently to encourage bushy growth and prevent it from becoming leggy. Divide and repot mint every 2-3 years to maintain its vigor. Watch for pests like spider mites and aphids, and treat with insecticidal soap if necessary.

    Benefits: Mint is packed with vitamins A and C, iron, calcium, and magnesium. It has antioxidant properties that support overall health and can help alleviate digestive issues. Mint can also be used to freshen breath and add flavor to various dishes and beverages.

    Medicinal Use: Mint has been used for centuries to soothe digestive problems, including indigestion, nausea, and irritable bowel syndrome (IBS). The menthol in mint has a calming effect on the muscles of the digestive tract. Mint tea can relieve headaches and respiratory congestion. It also has antibacterial and antiviral properties, making it useful for treating colds and flu. Topically, mint leaves can be used to relieve itching and skin irritations.

    Thyme

    Growing Tips: Thyme is a drought-tolerant herb that thrives in well-drained soil and full sun. It can be started from seeds, cuttings, or transplants. Sow seeds indoors 6-8 weeks before the last frost, or directly in the garden once the soil has warmed. Space plants about 12 inches apart to allow for adequate air circulation. Thyme grows well in containers, making it ideal for small spaces.

    Care: Water thyme sparingly, allowing the soil to dry out between waterings. Overwatering can lead to root rot. Thyme benefits from a light application of organic fertilizer or compost in the spring. Prune the plant regularly to encourage bushy growth and remove any woody stems. Thyme is generally pest-free but watch for spider mites and treat with insecticidal soap if necessary.

    Benefits: Thyme is rich in vitamins C and A, as well as iron and manganese. It has powerful antioxidant properties that help protect cells from damage. Thyme can enhance the flavor of many dishes and supports respiratory and immune health.

    Medicinal Use: Thyme has been used traditionally to treat respiratory issues such as coughs, bronchitis, and sore throats due to its antiseptic and antibacterial properties. Thyme tea can relieve digestive problems and improve overall digestion. The herb contains thymol, which has antimicrobial properties, making it effective in treating infections. Thyme can also be used as a natural remedy for acne and skin irritations. Its essential oil is often used in aromatherapy to relieve stress and promote relaxation.


    “Vegetables” Plants for small garden

    Cherry Tomatoes 🍅

    Growing Tips: Cherry tomatoes are ideal for small gardens due to their compact size and prolific yield. Choose a sunny spot with at least 6-8 hours of direct sunlight. Start seeds indoors 6-8 weeks before the last frost date or purchase young plants from a nursery. Plant them in well-draining soil enriched with compost. Space the plants about 2 feet apart to ensure good air circulation. Use stakes, cages, or trellises to support the vines as they grow. Water consistently, keeping the soil moist but not waterlogged, and mulch to retain moisture.

    Care: Regular pruning helps cherry tomato plants stay healthy and productive. Remove the suckers (small shoots that grow between the main stem and branches) to focus the plant’s energy on fruit production. Fertilize every 2-4 weeks with a balanced, water-soluble fertilizer. Monitor for pests like aphids and tomato hornworms, and use organic treatments if necessary. Harvest tomatoes when they are fully colored and firm, picking them regularly to encourage more fruiting.

    Benefits: Cherry tomatoes are rich in vitamins A and C, potassium, and antioxidants like lycopene, which supports heart health and reduces the risk of certain cancers. They are low in calories and high in fiber, making them a healthy snack option.

    Medicinal Use: The antioxidants in cherry tomatoes help combat inflammation and oxidative stress. Lycopene has been studied for its potential to protect against sunburn and improve skin health. Additionally, the high vitamin C content boosts the immune system and promotes healthy skin and gums.

    Peppers 🌶️

    Growing Tips: Peppers thrive in warm, sunny locations with well-drained soil. Start seeds indoors several weeks before the last frost date, then transplant seedlings outdoors once the soil has warmed. Provide support for taller pepper varieties to prevent the stems from bending or breaking.

    Care: Peppers require consistent moisture, so water regularly, especially during hot, dry periods. Mulch around the plants to help retain soil moisture and suppress weeds. Fertilize peppers every few weeks with a balanced fertilizer to encourage healthy growth and fruit development.

    Benefits: Peppers come in a variety of colors, shapes, and heat levels, offering versatility in the kitchen. They are rich in vitamins A and C, as well as antioxidants that support immune function and skin health. Whether eaten raw, roasted, or stuffed, peppers add flavor and nutritional value to meals.

    Medicinal Use: Capsaicin, the compound responsible for the heat in peppers, has been studied for its potential health benefits, including pain relief, improved digestion, and metabolism regulation. Peppers also contain other phytonutrients that contribute to their medicinal properties.

    Bush Beans 🫘

    Growing Tips: Bush beans are an excellent choice for small gardens due to their compact size and high yield. Plant seeds directly in the garden after the danger of frost has passed. Choose a sunny location with well-draining soil. Sow seeds about 1 inch deep and 2-3 inches apart in rows spaced 18 inches apart. Beans prefer a soil pH of 6.0-6.8 and benefit from being planted in soil enriched with compost.

    Care: Water beans regularly, keeping the soil evenly moist, especially during flowering and pod development. Mulch to conserve moisture and suppress weeds. Fertilize with a balanced, low-nitrogen fertilizer if necessary, as beans can fix their own nitrogen. Support plants with stakes or small trellises if needed. Monitor for pests like aphids and bean beetles, and use organic methods for control.

    Benefits: Bush beans are a great source of protein, fiber, vitamins A and C, folate, and iron. They are low in calories and can contribute to heart health, improved digestion, and stable blood sugar levels. Beans are also rich in antioxidants, which help protect against chronic diseases.

    Medicinal Use:The fiber content in bush beans aids in maintaining a healthy digestive system and can help lower cholesterol levels. The folate and iron in beans are essential for preventing anemia and supporting overall energy levels. Additionally, the antioxidants found in beans have anti-inflammatory properties and can help reduce the risk of chronic illnesses, including heart disease and cancer.

    Cucumbers 🥒

    Growing Tips: Cucumbers prefer warm temperatures and well-drained soil rich in organic matter. Plant seeds or seedlings in a sunny location with ample space for the vines to spread. Provide support for vining varieties using trellises or fences to save space and prevent fruit from rotting on the ground.

    Care: Keep the soil consistently moist, as cucumbers are heavy drinkers. Mulch around the plants to retain soil moisture and suppress weeds. Regularly harvest ripe cucumbers to encourage continuous fruit production. Monitor for pests like cucumber beetles and aphids and treat them promptly if found.

    Benefits: Cucumbers are hydrating and low in calories, making them a refreshing addition to salads, sandwiches, and drinks. They contain vitamins K and C, as well as antioxidants that promote skin health and hydration. Growing your own cucumbers ensures you have access to fresh, crisp produce all season long.

    Medicinal Use: Cucumbers have long been used in traditional medicine for their cooling and hydrating properties. They are believed to support digestion, aid in weight management, and promote detoxification. Additionally, cucumber extract is often used in skincare products for its soothing and moisturizing effects.


    “Root Vegetables” for small garden

    Beets

    Growing Tips: Beets are a fantastic addition to any small garden due to their dual purpose of providing both roots and greens. To grow beets successfully, choose a sunny spot with well-draining soil. Sow seeds directly into the garden bed about 1/2 inch deep and 1 inch apart. Thin seedlings to 3-4 inches apart to give them room to develop. Beets prefer cooler weather, so plant them in early spring or late summer for a fall harvest. Regular watering is essential, especially as the roots develop, but avoid waterlogging the soil.

    Care: Keep the soil moist but not soggy. Mulching around the plants can help retain moisture and suppress weeds. Beets are relatively low-maintenance, but occasional feeding with a balanced fertilizer can boost growth. Watch out for pests like leaf miners and aphids; use insecticidal soap or neem oil if necessary.

    Benefits: Beets are rich in essential nutrients such as fiber, folate, and vitamin C. They are known to support liver health, improve blood circulation, and reduce inflammation. Both the roots and greens are edible and packed with antioxidants.

    Medicinal Use: Beets have been used medicinally to support heart health due to their high nitrate content, which helps lower blood pressure. They also contain betaine, which is beneficial for liver function and detoxification. The antioxidants in beets can help reduce oxidative stress and inflammation, contributing to overall well-being.

    Garlic 🧄

    Growing Tips: Garlic is easy to grow and perfect for small gardens. Plant garlic cloves in the fall, about 6-8 weeks before the first frost, with the pointed end up, 2 inches deep, and 6 inches apart. Garlic thrives in well-drained soil rich in organic matter and requires full sun.

    Care: Garlic needs consistent watering, particularly during dry spells, but overwatering should be avoided to prevent rot. In the spring, side-dress with compost or a balanced fertilizer to encourage robust growth. Remove any flower stalks that appear (called scapes) to focus the plant’s energy on bulb development.

    Benefits: Garlic is renowned for its culinary uses and its health benefits. It is rich in vitamins C and B6, manganese, and selenium. Regular consumption of garlic can boost the immune system, lower blood pressure, and improve cholesterol levels.

    Medicinal Use: Garlic has been used medicinally for thousands of years. It contains allicin, a compound with antibacterial, antiviral, and antifungal properties. Garlic is also known to improve cardiovascular health, support immune function, and have anti-cancer properties. Its natural anti-inflammatory effects can help reduce the risk of chronic diseases.

    Onions🧅

    Growing Tips: Onions are a versatile vegetable that can thrive in small garden spaces. Start onions from sets or seeds in early spring or fall. They prefer a sunny location with fertile, well-draining soil. Plant sets 1 inch deep and 4 inches apart. Thin seedlings to 4-6 inches apart to ensure adequate space for bulb formation.

    Care: Onions require regular watering, especially during dry periods, but be careful not to overwater as this can lead to rot. Fertilize with a balanced fertilizer or compost during the growing season. Keep the area weed-free to reduce competition for nutrients.

    Benefits: Onions are a staple in many kitchens due to their flavor and versatility. They are high in vitamins C and B6, folate, potassium, and antioxidants. Onions are known to support heart health, reduce inflammation, and boost the immune system.

    Medicinal Use: Onions have anti-inflammatory, antibacterial, and antioxidant properties. Quercetin, an antioxidant found in onions, can help reduce inflammation and lower blood pressure. Onions are also beneficial for digestive health, helping to prevent infections and promote the growth of healthy gut bacteria.

    Radishes

    Growing Tips: Radishes are one of the fastest-growing root vegetables, making them perfect for small gardens. Plant radish seeds directly in the garden in early spring or fall. Sow seeds about 1/2 inch deep and 1 inch apart. Thin seedlings to 2 inches apart once they have a few leaves.

    Care: Radishes require consistent moisture to grow quickly and develop a mild flavor. Mulching can help retain soil moisture and keep the soil cool. They do not need heavy feeding; a light application of compost or a balanced fertilizer will suffice.

    Benefits: Radishes are low in calories but high in vitamins C and B6, potassium, and fiber. They are great for snacking, adding to salads, or garnishing dishes. Radishes also support liver function and detoxification.

    Medicinal Use: Radishes have traditionally been used to support digestive health and detoxification. Their high water content helps keep you hydrated and can aid in digestion. Radishes also have diuretic properties, which can help flush out toxins and support kidney health. Their natural antibacterial properties can help fight infections.

    Carrots

    Growing Tips: Carrots are a rewarding root vegetable for small gardens. Sow carrot seeds directly into loose, well-draining soil in early spring or late summer. Plant seeds 1/4 inch deep and 2-3 inches apart. Thin seedlings to 3 inches apart to allow room for the roots to grow.

    Care: Carrots need consistent watering to prevent the roots from becoming tough and woody. Mulching helps retain soil moisture and keep the roots cool. Fertilize with a balanced, low-nitrogen fertilizer to encourage root development.

    Benefits: Carrots are an excellent source of beta-carotene, which the body converts into vitamin A. They also provide fiber, vitamin K, and potassium. Regular consumption of carrots supports eye health, boosts the immune system, and improves skin health.

    Medicinal Use: Carrots are known for their high antioxidant content, which helps fight free radicals and reduce the risk of chronic diseases. The beta-carotene in carrots supports eye health and can help prevent conditions like cataracts and macular degeneration. Carrots also have anti-inflammatory properties and can support digestive health.

    Subscribe to our newsletter!

    Discover the joy😋 of cultivating your own edible oasis with our guide on “Edible Plants for Small Gardens: A Rewarding Experience.” Learn how to maximize your limited space with carefully selected herbs, fruits, and vegetables that thrive in compact environments. From vibrant herbs like basil and mint to compact fruit trees like dwarf citrus varieties, unlock the potential of your small garden. Discover practical tips for soil preparation, container gardening, and companion planting to optimize growth and flavor. Embrace the satisfaction of harvesting your own fresh produce, enhancing both your garden and your culinary creations. Start your delicious journey today with Zardens!

  • “Best Flowering Plants for a Small Garden and Gardening Tips”

    Flowering plants, also known as angiosperms, are the most diverse group of land plants, with over 300,000 known species. They are characterized by the presence of flowers, reproductive structures that produce seeds enclosed within a fruit. This unique feature distinguishes them from gymnosperms, whose seeds are not enclosed. Flowering plants can be found in a wide range of environments, from deserts to tropical rainforests, and include trees, shrubs, grasses, and herbaceous plants. Lets dive into Plants for a Small Garden with Zardens.

    The life cycle of flowering plants includes several key stages: germination, growth, flowering, pollination, seed formation, and seed dispersal. The flower is the reproductive organ, typically consisting of sepals, petals, stamens, and carpels. The stamens produce pollen, the male gametophyte, while the carpels contain ovules, the female gametophyte. Pollination occurs when pollen is transferred from the stamens to the stigma of a carpel, often facilitated by wind, water, or animals such as insects, birds, and bats.

    After pollination and fertilization, the ovules develop into seeds, and the surrounding ovary matures into a fruit, which aids in seed dispersal. This can happen through various mechanisms, including being eaten by animals, carried by wind, or floating on water.

    Flowering plants play a crucial role in ecosystems and human life. They are primary producers in many habitats, forming the base of food chains and providing oxygen through photosynthesis. They also contribute to soil formation and stabilization, water cycle regulation, and provide habitats for numerous other organisms.

    For humans, flowering plants are vital for food, medicine, timber, fiber, and ornamental purposes. Many flowering plants are sources of pharmaceuticals, dyes, and perfumes. The beauty and variety of flowers also make them a key component of gardens and landscapes, enhancing the aesthetic value of our surroundings.

    For a small garden, selecting flowering plants that are compact, versatile, and colorful is essential. Here are some of the best flowering plants for small gardens, categorized by their specific needs and features.

    Sun-Loving Flowering Plants

    Plants for a Small Garden

    1.Petunia (Petunia x hybrida)

    • Specific Needs: Full sun (at least 6 hours of direct sunlight daily), well-drained soil, regular watering.
    • Features: Petunias are known for their abundant blooms and come in a wide range of colors including pink, purple, red, white, and yellow. They are ideal for hanging baskets, containers, and garden beds. Petunias bloom from spring to fall and are relatively low maintenance, making them perfect for small gardens.

    2. Marigold (Tagetes)

    • Specific Needs: Full sun, well-drained soil, moderate watering.
    • Features: Marigolds are bright, cheerful flowers available in shades of yellow, orange, and red. They are known for their pest-repellent properties, making them beneficial companion plants. Marigolds are hardy annuals that bloom from spring to frost and are easy to grow, thriving in containers and garden borders.

    3. Zinnia (Zinnia elegans)

    • Specific Needs: Full sun, well-drained soil, regular watering (avoid overhead watering to prevent mildew).
    • Features: Zinnias produce vibrant, long-lasting blooms in a variety of colors, including pink, red, yellow, and orange. They attract butterflies and are excellent for cutting gardens. Zinnias are annuals that bloom from late spring to the first frost and are well-suited for small garden beds and containers due to their compact growth habit.

    4. Lavender (Lavandula)

    • Specific Needs: Full sun, well-drained sandy or loamy soil, minimal watering once established.
    • Features: Lavender is valued for its fragrant purple flowers and aromatic foliage. It is a perennial that attracts bees and other pollinators. Lavender blooms from late spring to summer and can be used in garden borders, rock gardens, and containers. Its drought tolerance and low maintenance make it ideal for small gardens.

    Shade-Tolerant Flowering Plants

    1. Begonia (Begonia spp.)

    Specific Needs and Features:

    • Light Requirements: Partial to full shade.
    • Soil: Well-draining, rich in organic matter.
    • Watering: Consistent moisture, but avoid waterlogging.
    • Bloom Time: Late spring to fall.
    • Features: Begonias are known for their vibrant flowers and attractive foliage. They come in a variety of colors, including red, pink, white, and orange. Their compact size makes them ideal for containers, window boxes, and shaded garden beds.

    2. Impatiens (Impatiens walleriana)

    Specific Needs and Features:

    • Light Requirements: Partial to full shade.
    • Soil: Moist, well-draining soil.
    • Watering: Regular watering to keep soil consistently moist.
    • Bloom Time: Late spring to fall.
    • Features: Impatiens are prolific bloomers that thrive in shady spots. They offer a wide range of colors, including red, pink, white, purple, and orange. Their dense growth habit makes them excellent for borders, containers, and hanging baskets.

    3. Astilbe (Astilbe spp.)

    Specific Needs and Features:

    • Light Requirements: Partial shade to full shade.
    • Soil: Moist, well-draining, rich in organic matter.
    • Watering: Requires consistent moisture, especially in dry conditions.
    • Bloom Time: Early summer to late summer.
    • Features: Astilbes produce feathery plumes of flowers in shades of pink, red, white, and purple. They add a soft, airy texture to shaded areas. Their attractive, fern-like foliage provides interest even when the plants are not in bloom. Astilbes are perfect for borders, woodland gardens, and shaded perennial beds.

    4. Hellebore (Helleborus spp.)

    Specific Needs and Features:

    • Light Requirements: Partial to full shade.
    • Soil: Well-draining, rich in organic matter.
    • Watering: Moderate, avoid overly wet conditions.
    • Bloom Time: Late winter to early spring.
    • Features: Hellebores, also known as Lenten roses, are prized for their early bloom time and attractive, nodding flowers. They come in a range of colors, including white, pink, purple, and green. Their evergreen foliage adds year-round interest to the garden. Hellebores are ideal for woodland gardens, shaded borders, and containers.

    Perennial Flowering Plants

    Plants for a Small Garden

    1. Coneflower (Echinacea purpurea)

    • Sunlight Requirements: Full sun to partial shade.
    • Water Needs: Moderate; drought-tolerant once established.
    • Soil Preferences: Well-drained soil, tolerates poor to moderately fertile soil.
    • Special Features: Coneflowers have large, daisy-like flowers with raised centers. They attract butterflies and pollinators and are known for their long blooming period from midsummer to fall. They also make excellent cut flowers.

    2. Salvia (Salvia nemorosa)

    • Sunlight Requirements: Full sun.
    • Water Needs: Moderate; prefers regular watering but is somewhat drought-tolerant.
    • Soil Preferences: Well-drained soil, slightly acidic to neutral pH.
    • Special Features: Salvia produces spiky blooms in shades of purple, pink, or white. These plants are highly attractive to bees, butterflies, and hummingbirds. They also have a long blooming season, often from late spring through summer, and are deer-resistant.

    3. Black-eyed Susan (Rudbeckia hirta)

    • Sunlight Requirements: Full sun.
    • Water Needs: Low to moderate; drought-tolerant once established.
    • Soil Preferences: Well-drained soil, adaptable to various soil types including clay.
    • Special Features: Black-eyed Susans have bright yellow petals with dark centers. They bloom from mid-summer to early fall and are known for their resilience and low maintenance. They attract butterflies and other pollinators and are also deer-resistant.

    4. Coreopsis (Coreopsis verticillata)

    • Sunlight Requirements: Full sun.
    • Water Needs: Low to moderate; prefers well-drained soil and is drought-tolerant.
    • Soil Preferences: Sandy or loamy soil, well-drained.
    • Special Features: Coreopsis, also known as tickseed, produces masses of yellow, daisy-like flowers from early summer to fall. They attract butterflies and bees, and their long blooming period makes them a favorite for continuous garden color. Coreopsis is also deer-resistant and low-maintenance.

    Annual Flowering Plants

    1. Nasturtium (Tropaeolum majus)

    Specific Needs:

    • Light: Full sun to partial shade.
    • Soil: Well-drained, moderately fertile soil.
    • Water: Regular watering, but tolerate some drought once established.

    Features:

    • Flowers: Brightly colored in shades of orange, red, yellow, and cream.
    • Growth Habit: Can be trailing or bushy, making it versatile for containers, borders, or hanging baskets.
    • Edibility: Both flowers and leaves are edible with a peppery taste, often used in salads.
    • Companion Planting: Deters pests like aphids and whiteflies, making it beneficial to plant near vegetables.

    2. Cosmos (Cosmos bipinnatus)

    Specific Needs:

    • Light: Full sun.
    • Soil: Well-drained soil; tolerates poor soils.
    • Water: Moderate watering, drought-tolerant once established.

    Features:

    • Flowers: Daisy-like blooms in white, pink, purple, and red.
    • Growth Habit: Tall and airy with feathery foliage, reaching 1-6 feet in height, suitable for borders and backdrops.
    • Pollinator Attraction: Attracts bees, butterflies, and other pollinators.
    • Cut Flowers: Excellent for cutting gardens, long-lasting in vases.

    3. Snapdragon (Antirrhinum majus)

    Specific Needs:

    • Light: Full sun to partial shade.
    • Soil: Well-drained, fertile soil.
    • Water: Regular watering, keeping soil evenly moist but not waterlogged.

    Features:

    • Flowers: Tall spikes of dragon-shaped blooms in a wide range of colors including red, pink, yellow, orange, and white.
    • Growth Habit: Upright growth, typically 1-3 feet tall, making them great for vertical interest in small gardens.
    • Bloom Time: Long blooming period from spring through fall.
    • Pollinator Attraction: Attracts hummingbirds and bees.

    4. Alyssum (Lobularia maritima)

    Specific Needs:

    • Light: Full sun to partial shade.
    • Soil: Well-drained soil; thrives in poor to moderately fertile soils.
    • Water: Regular watering, with good drainage.

    Features:

    • Flowers: Small, sweetly fragrant blooms in white, pink, lavender, or purple.
    • Growth Habit: Low-growing and spreading, typically 4-8 inches tall, perfect for edging, ground cover, or containers.
    • Fragrance: Known for its pleasant honey-like fragrance.
    • Pollinator Attraction: Attracts bees and other beneficial insects

    Flowering Ground Covers

    Plants for a Small Garden

    1. Creeping Thyme (Thymus serpyllum)

    Features:

    • Growth Habit: Low-growing, mat-forming perennial.
    • Height: 2-3 inches.
    • Spread: 12-18 inches.
    • Flower Color: Purple, pink, or white.
    • Bloom Time: Late spring to early summer.
    • Foliage: Aromatic, tiny, evergreen leaves.

    Specific Needs:

    • Light: Full sun.
    • Soil: Well-drained, sandy or loamy soil.
    • Water: Drought-tolerant once established; water moderately.
    • Maintenance: Minimal; occasional trimming to maintain shape and encourage dense growth.
    • Uses: Ideal for rock gardens, between stepping stones, and as a fragrant lawn alternative.

    2. Phlox subulata (Creeping Phlox)

    Features:

    • Growth Habit: Dense, spreading evergreen perennial.
    • Height: 3-6 inches.
    • Spread: 12-24 inches.
    • Flower Color: Pink, purple, white, or blue.
    • Bloom Time: Early to late spring.
    • Foliage: Needle-like, dark green leaves.

    Specific Needs:

    • Light: Full sun to partial shade.
    • Soil: Well-drained, slightly acidic soil.
    • Water: Moderate; prefers consistent moisture but can tolerate short periods of drought.
    • Maintenance: Low; may need occasional shearing after blooming to promote compact growth.
    • Uses: Great for ground cover in rock gardens, slopes, and edging along paths and borders.

    3. Viola (Viola tricolor)

    Features:

    • Growth Habit: Low-growing, spreading annual or perennial.
    • Height: 4-8 inches.
    • Spread: 6-12 inches.
    • Flower Color: Shades of purple, blue, yellow, and white.
    • Bloom Time: Spring and fall, with some blooming continuously in cooler climates.
    • Foliage: Heart-shaped, green leaves.

    Specific Needs:

    • Light: Partial shade to full sun.
    • Soil: Moist, well-drained soil rich in organic matter.
    • Water: Regular watering to keep soil consistently moist, especially during dry spells.
    • Maintenance: Deadhead spent blooms to encourage continuous flowering; may need mulching to retain moisture.
    • Uses: Suitable for borders, containers, and as a ground cover in shaded areas.

    4. Lamium (Lamium maculatum)

    Features:

    • Growth Habit: Spreading, semi-evergreen perennial.
    • Height: 6-8 inches.
    • Spread: 12-24 inches.
    • Flower Color: Pink, white, or purple.
    • Bloom Time: Late spring to early summer.
    • Foliage: Variegated leaves with silvery markings.

    Specific Needs:

    • Light: Partial to full shade.
    • Soil: Moist, well-drained soil.
    • Water: Moderate; prefers consistent moisture but can tolerate short dry periods.
    • Maintenance: Low; trim back after flowering to maintain compact growth and encourage a second bloom.
    • Uses: Excellent for shady areas, under trees, and as a ground cover in woodland gardens.

    Compact Flowering Shrubs

    Plants for a Small Garden

    1. Dwarf Hydrangea (Hydrangea paniculata ‘Bobo’)
    • Specific Needs: While hydrangeas generally prefer partial shade, the ‘Bobo’ cultivar can tolerate more sun.
    • Features: Compact size with large, showy flower clusters that bloom from summer to fall. It’s perfect for adding vibrant color to shaded areas.

    2. Azalea (Rhododendron spp.)

    • Specific Needs: Azaleas thrive in partial shade to full shade, making them ideal for gardens with limited sunlight.
    • Features: Stunning spring flowers in various colors, including pink, white, red, and purple. Many varieties are compact and suitable for small spaces, adding a pop of color to shaded areas.

    3.Roses (Rosa spp. especially miniature varieties)

    • Specific Needs: Roses typically require full sun to bloom profusely, making them perfect for sunny spots in the garden.
    • Features: Beautiful, fragrant flowers in a variety of colors and forms. Miniature rose varieties are particularly well-suited for small gardens, offering classic beauty in a compact package.

    4.Spirea (Spiraea japonica ‘Magic Carpet’)

    • Specific Needs: Spirea prefers full sun but can tolerate some shade, making it versatile for various garden conditions.
    • Features: Low-growing with vibrant pink flowers and colorful foliage that changes throughout the seasons. It’s a hardy and adaptable shrub that adds year-round interest to sunny garden spaces.

    Tips for a Flower-Filled Small Garden

    Here are 7 tips to help you create a flower-filled small garden

    1. Choose compact and colorful varieties: Opt for flowering plants that are specifically bred for small spaces, such as dwarf varieties of roses, hydrangeas, and daylilies.
    2. Utilize vertical space: Make use of trellises, hanging baskets, and wall-mounted planters to maximize planting area and add visual interest.
    3. Plan for succession planting: Select flowers that bloom at different times of the year to ensure continuous color and interest throughout the seasons.
    4. Create layers of height: Incorporate plants of varying heights to add depth and dimension to your garden. Place taller plants towards the back or center, and shorter plants towards the front or edges.
    5. Mix flowers with foliage: Intersperse flowering plants with foliage plants to create contrast and texture. Consider using evergreen shrubs, ornamental grasses, and ground covers to complement your flower display.
    6. Use containers strategically: Plant flowers in pots and containers to save ground space and add mobility to your garden. Place containers strategically around your garden to create focal points and fill in gaps.
    7. Consider companion planting: Pair flowers with herbs, vegetables, and other plants that complement each other’s growth habits and needs. For example, plant marigolds alongside tomatoes to deter pests, or grow lavender near roses to attract pollinators. Lets Summarise Tips Small Garden with Zardens.

    TipsDescription
    Compact and ColorfulChoose small varieties with vibrant blooms.
    Vertical SpaceUtilize trellises and hanging baskets.
    Succession PlantingPlan for continuous blooming throughout the year.
    Layers of HeightCreate depth by mixing plants of different heights.
    Mix Flowers with FoliageCombine flowers with foliage for visual interest.
    Strategic ContainersUse pots and containers to save space and add mobility.
    Companion PlantingPair flowers with plants that support their growth.

  • “Tomato Tales, Unraveling The Diversity of Tomato Varieties”
    “Tomato Tales, Unraveling The Diversity of Tomato Varieties”

    Diversity of Tomato Varieties

    Tomatoes🍅 , often mistaken for vegetables, are actually fruits belonging to the nightshade family. Originating from South America, they have journeyed across the globe, becoming a staple in various cuisines due to their versatility and rich nutritional profile. One of the most fascinating aspects of tomatoes is their variety. From the tiny cherry tomatoes that burst with sweetness to the large beefsteaks perfect for sandwiches, there’s a type for every culinary need. Varieties like Roma are ideal for sauces, while heirlooms, with their unique colors and flavors, are often featured in salads and gourmet dishes.

    Nutritionally, tomatoes are powerhouses. They are rich in vitamins A and C, potassium, and folate. Their vibrant red color comes from lycopene, a powerful antioxidant linked to numerous health benefits, including reduced risk of heart disease and cancer. Lycopene is more easily absorbed by the body when tomatoes are cooked, making dishes like tomato sauce not just tasty but also highly nutritious. Tomatoes are incredibly versatile in the kitchen. They can be eaten raw, cooked, or dried. Fresh tomatoes are perfect for salads, salsas, and sandwiches. Cooked, they form the base of countless sauces, soups, and stews. Sun-dried tomatoes add a burst of concentrated flavor to various dishes. Their umami-rich profile enhances the taste of many foods, making them a favorite among chefs and home cooks alike.

    Growing tomatoes is also popular among gardeners, both outdoors and indoors. With the right conditions—plenty of sunlight, warmth, and water—they can thrive and produce a bountiful harvest. Varieties like Tiny Tim and Patio Princess are especially suited for indoor gardening, allowing even those with limited space to enjoy home-grown tomatoes. In summary, the tomato is a remarkable fruit that enriches our diets and cuisines. Whether you’re savoring a fresh tomato salad, a hearty tomato soup, or a homemade tomato sauce, this versatile fruit proves itself indispensable in the culinary world. lets Explore The Little world of tomatoes with Zardens


    Choosing the Right Variety of Tomatoes for Indoor Gardening

    Indoor gardening is a delightful way to enjoy fresh produce year-round, and tomatoes are one of the most rewarding plants to grow indoors. However, to ensure success, selecting the right variety is crucial. Not all tomatoes are created equal, especially when it comes to indoor cultivation. Let’s dive into the best varieties to bring a splash of summer to your indoor garden.

    Diversity of Tomato Varieties

    Why Variety Matters

    Choosing the right tomato variety is like picking the perfect pair of shoes: the right fit makes all the difference. Indoor growing conditions differ significantly from outdoor ones. Space constraints, light availability, and container limitations all play a role in how well your tomatoes will thrive indoors. Here are some key factors to consider:

    1. Size Matters: Indoor spaces usually can’t accommodate sprawling vines. Opt for compact or dwarf varieties.
    2. Determinate vs. Indeterminate: Determinate varieties grow to a set height and produce all their fruit at once, making them easier to manage indoors.
    3. Fruit Size: Smaller fruiting varieties often perform better indoors, as they require less energy and space to mature.

    Top Varieties for Indoor Gardening

    1. Tiny Tim Tiny Tim is the poster child for indoor tomato growing. This dwarf variety reaches about 12-18 inches in height, making it perfect for small spaces. Despite its size, it produces a generous crop of bright red, cherry-sized tomatoes that are sweet and delicious.

    2. Patio Princess If you’re looking for a tomato plant that doubles as a decorative plant, Patio Princess is your go-to. This compact variety grows about 18-24 inches tall and offers a continuous supply of small, flavorful tomatoes. It’s not just productive but also visually appealing, with a lush, bushy appearance.

    3. Red Robin Red Robin is another excellent choice for indoor gardeners. This tiny dynamo grows only 8-12 inches tall but is prolific, yielding an abundance of small, red cherry tomatoes. It’s particularly well-suited to grow under artificial lights, making it a favorite among indoor gardening enthusiasts.

    4. Yellow Canary For a splash of color, try Yellow Canary. This variety produces small, yellow tomatoes that are as sweet as they are eye-catching. Growing to about 12-15 inches, it fits perfectly on a sunny windowsill or under grow lights. The bright yellow fruit adds a cheerful touch to any indoor garden setup.

    Tips for Success

    • Light: Even the best varieties need plenty of light. Ensure your tomatoes get 14-18 hours of light daily, using grow lights if necessary.
    • Watering: Keep the soil consistently moist but not waterlogged. Indoor conditions can dry out soil quickly, so regular checks are essential.
    • Support: Despite their compact size, many dwarf varieties benefit from some support. Small stakes or cages can help keep plants upright and healthy.

    Soil Basics: The Foundation of Your Tomato Success

    No matter the variety, all tomatoes thrive in well-draining, nutrient-rich soil. Here’s a step-by-step guide to preparing the perfect soil mix for your tomato plants. Start with a soil test. This helps you understand the pH and nutrient levels of your soil. Tomatoes prefer a slightly acidic to neutral pH (6.0-7.0). Soil testing kits are available at garden centers or you can send a sample to a local extension service.

    Amending the Soil

    Based on your soil test results, you’ll need to amend your soil. Here’s what you’ll need:

    • Organic Matter: Add compost or well-rotted manure to improve soil structure and fertility. Aim for about 3-4 inches mixed into the top 12 inches of soil.
    • Adjusting pH: If your soil is too acidic, add lime. If it’s too alkaline, use sulfur or composted pine needles to lower the pH.
    • Nutrients: Incorporate a balanced fertilizer. Look for one with an N-P-K ratio of around 5-10-10, which means it has more phosphorus and potassium to support fruit development.

    Special Considerations for Different Varieties

    Now, let’s tailor the soil prep for specific tomato types.

    Determinate Tomatoes

    These varieties need soil that supports rapid growth and fruiting over a short period. Focus on:

    • Nutrient Density: Ensure the soil is rich in nutrients with plenty of compost.
    • Consistency: Maintain even moisture levels to prevent blossom end rot, a common issue for determinate varieties.
    Indeterminate Tomatoes

    These long growers require a steady supply of nutrients and strong root support.

    • Deep Soil: These varieties benefit from deeper soil prep. Dig down at least 18 inches to accommodate their extensive root systems.
    • Ongoing Fertilization: Plan to side-dress with compost or a balanced fertilizer every few weeks to sustain their growth.
    Heirloom Tomatoes

    Heirlooms are often more sensitive and need a bit more TLC.

    • Rich Organic Matter: Heirlooms thrive in soil loaded with organic matter. Use compost, leaf mold, and even aged manure.
    • Mulching: Mulch heavily around heirlooms to retain moisture and regulate soil temperature.

    Before planting, ensure the soil is loose and well-aerated. Avoid compacting the soil, as tomatoes need good drainage and root expansion.


    Tailoring Light Requirements for Different Tomato Varieties

    Growing tomatoes indoors is a gratifying adventure, but it comes with its unique set of challenges. One of the most crucial elements to get right is lighting. Different tomato varieties have different light needs, and understanding these can make the difference between a bountiful harvest and a disappointing crop. Let’s dive into the light requirements for various tomato varieties and how you can optimize your indoor garden for success.

    Diversity of Tomato Varieties

    The Basics of Tomato Lighting

    Before we explore specific varieties, it’s important to understand why light is so essential for tomatoes. Tomatoes are sun-loving plants that thrive on ample light to produce energy through photosynthesis. This energy fuels their growth, flowering, and fruiting processes. When growing indoors, replicating the natural sunlight they crave is key to achieving healthy, productive plants.

    Tiny Tim: The Compact Contender

    Tiny Tim tomatoes are a favorite for indoor gardeners due to their compact size and prolific nature. These dwarf tomatoes only grow about 12-18 inches tall, making them perfect for windowsills or small spaces. Despite their size, they still demand a lot of light. Aim for:

    • Light Duration: 14-16 hours per day
    • Light Intensity: Medium to high intensity; LED grow lights positioned 2-4 inches above the plant work best.

    Patio Princess: The Indoor Royalty

    Patio Princess tomatoes are another excellent choice for indoor cultivation. These determinate plants stay manageable in size while offering a generous yield. To keep your Patio Princess thriving:

    • Light Duration: 12-14 hours per day
    • Light Intensity: Moderate intensity; a combination of natural light from a sunny window and supplemental LED grow lights can be effective.

    Red Robin: The Cherry Champion

    Red Robin tomatoes are beloved for their small, sweet cherry tomatoes and ease of growth indoors. These determinate plants are quite adaptable but still need sufficient light to produce their signature fruit:

    • Light Duration: 14-16 hours per day
    • Light Intensity: Medium intensity; place LED grow lights about 3-4 inches above the plants to ensure even light distribution.

    Yellow Canary: The Bright Bloomer

    Yellow Canary tomatoes are known for their vibrant yellow fruit and compact growth habit. These tomatoes bring a splash of color to any indoor garden and require:

    • Light Duration: 14-16 hours per day
    • Light Intensity: High intensity; LED grow lights positioned close to the plant (about 2-3 inches) will help maintain their bright, sunny hue.

    Lighting Tips for Indoor Tomato Success

    1. Consistent Lighting Schedule: Use timers to maintain a consistent light schedule. This helps mimic the natural daylight cycle and promotes steady growth.
    2. Adjustable Lighting: As your tomato plants grow, adjust the height of your grow lights to keep them at the optimal distance. Too close, and you risk burning the plants; too far, and they may become leggy and weak.
    3. Light Quality: Full-spectrum LED grow lights are ideal as they provide a balance of red, blue, and other wavelengths that mimic natural sunlight and support all stages of growth.
    4. Reflective Surfaces: Enhance light efficiency by placing reflective materials like mylar or white surfaces around your plants. This helps bounce light back onto the plants, ensuring they receive as much light as possible.

    Watering Different Tomato Varieties for Perfection

    Tomatoes are the jewels of the garden, bursting with flavor and vibrant color. Whether you’re growing beefsteak, cherry, or heirloom varieties, watering is a critical factor that can make or break your harvest. Let’s dive into the art of watering different types of tomatoes, ensuring your plants thrive and produce the juiciest fruits.

    Beefsteak Beauties: A Thirsty Affair

    Beefsteak tomatoes are the giants of the tomato world, known for their large, meaty fruits. These hefty plants require consistent moisture to support their vigorous growth and fruit development.

    Watering Tips:

    • Frequency: Water beefsteak tomatoes deeply once or twice a week, ensuring the soil is evenly moist.
    • Volume: Aim for about 1-1.5 inches of water per week, depending on the weather and soil type.
    • Technique: Use a soaker hose or drip irrigation to deliver water directly to the roots, minimizing leaf wetness and reducing the risk of fungal diseases.

    Cherry Tomatoes: Tiny Treasures with Big Needs

    Cherry tomatoes, with their small size and explosive flavor, are a favorite for salads and snacking. Despite their petite fruits, these plants can be quite thirsty, especially in containers.

    Watering Tips:

    • Frequency: Cherry tomatoes prefer more frequent watering, about every 2-3 days, especially in hot weather.
    • Volume: Ensure the soil stays consistently moist but not waterlogged. In containers, water until you see it draining out of the bottom.
    • Technique: Mulch around the base of the plants to retain moisture and keep the soil cool.

    Heirloom Varieties: The Delicate Balance

    Heirloom tomatoes are prized for their unique flavors and colors. These varieties can be a bit finicky, and their watering needs vary slightly compared to hybrids.

    Watering Tips:

    • Frequency: Heirlooms benefit from consistent moisture, so water them deeply once a week.
    • Volume: About 1 inch of water per week is usually sufficient, but adjust based on rainfall and temperature.
    • Technique: Water early in the morning to allow foliage to dry during the day, reducing disease risk. Mulching is also beneficial to maintain soil moisture levels.

    Container Tomatoes: Custom Care

    Growing tomatoes in containers is a fantastic way to enjoy fresh produce even in limited space. However, containers dry out faster than garden soil, requiring more diligent watering.

    Watering Tips:

    • Frequency: Check the soil daily, and water thoroughly when the top inch feels dry.
    • Volume: Water until it flows out of the drainage holes to ensure the entire root ball gets hydrated.
    • Technique: Use self-watering containers if possible, which provide a steady moisture supply.

    General Watering Wisdom

    Regardless of the variety, there are some universal tips for watering tomatoes effectively:

    • Consistency is Key: Irregular watering can lead to problems like blossom end rot and splitting fruit.
    • Avoid Overhead Watering: Wet leaves can promote fungal diseases. Water at the base of the plant.
    • Monitor the Weather: Adjust your watering schedule based on rainfall, humidity, and temperature.

    Mastering Pruning and Support for Different Tomato Varieties

    Tomatoes are a gardener’s delight, bursting with flavor and vibrant colors. But to truly get the best out of your tomato plants, understanding the nuances of pruning and support is crucial. Whether you’re growing indeterminate giants or compact determinate varieties, each type has its own set of needs. Let’s dive into the art of pruning and supporting your tomatoes to ensure a bountiful harvest!

    Diversity of Tomato Varieties

    Indeterminate Varieties: Reaching for the Sky

    Indeterminate tomatoes, also known as vining tomatoes, can grow indefinitely, often reaching heights of 6-10 feet or more. These varieties, like ‘Beefsteak’, ‘Cherokee Purple’, and ‘Sungold’, need diligent pruning and sturdy support to thrive.

    Pruning Tips for Indeterminate Tomatoes:

    1. Remove Suckers: These small shoots develop in the leaf axils (the point where the leaf stem meets the main stem). While some gardeners prefer to let a few suckers grow, removing most of them directs the plant’s energy into producing larger, juicier tomatoes.
    2. Top the Plant: Once the plant reaches the top of its support structure, pinch out the growing tip to encourage fruit ripening rather than further vertical growth.

    Support Systems for Indeterminate Tomatoes:

    • Stakes: Use tall, sturdy stakes (at least 6 feet) and tie the main stem loosely with garden twine as it grows.
    • Cages: Opt for large, robust cages that can support the plant’s weight and allow for easy access to the fruit.
    • Trellises: A-frame or vertical trellises provide excellent support and make harvesting a breeze.

    Determinate Varieties: Compact and Contained

    Determinate tomatoes, or bush tomatoes, such as ‘Roma’, ‘Celebrity’, and ‘Bush Early Girl’, grow to a fixed size, typically 3-4 feet tall. They produce fruit in a shorter, more concentrated period and require different pruning and support strategies.

    Pruning Tips for Determinate Tomatoes:

    1. Minimal Pruning: Determinate varieties benefit from minimal pruning. Removing too many leaves or suckers can reduce your overall yield.
    2. Remove Lower Leaves: To improve air circulation and reduce disease risk, trim the leaves that touch the ground or appear yellowed and unhealthy.

    Support Systems for Determinate Tomatoes:

    • Cages: Standard tomato cages work well, providing adequate support without overbearing the compact plants.
    • Stakes: Shorter stakes (3-4 feet) are sufficient. Tie the plants as they grow to keep them upright and prevent branches from breaking under the weight of the fruit.

    Semi-Determinate Varieties: The Best of Both Worlds

    Semi-determinate tomatoes, like ‘San Marzano’ and ‘Mountain Magic’, offer a blend of traits from both indeterminate and determinate varieties. They grow taller than determinate plants but are more manageable than their indeterminate counterparts.

    Pruning Tips for Semi-Determinate Tomatoes:

    1. Moderate Pruning: Remove some suckers to prevent overcrowding and improve airflow but leave enough foliage to support the plant’s growth and fruiting.

    Support Systems for Semi-Determinate Tomatoes:

    • Medium Stakes or Cages: Use supports that are sturdy but not as tall as those required for indeterminate varieties. A combination of stakes and cages can provide excellent support.

    Why Pruning and Support Matter

    Proper pruning and support are not just about aesthetics; they significantly impact the health and productivity of your tomato plants. By pruning, you manage the plant’s energy, directing it towards fruit production rather than excessive foliage. Meanwhile, robust support systems prevent the plants from sprawling, reducing the risk of disease and making harvesting easier

    Each tomato variety has unique needs, but with the right pruning and support strategies, you can optimize their growth and enjoy a delicious, abundant harvest. Experiment with different methods to see what works best in your garden, and watch your tomato plants flourish like never before. Happy gardening!


    FRP Container Selection for Growing Tomatoes Indoors

    Hello, fellow green thumbs! 🌱 If you’re anything like me, the sight of fresh, juicy tomatoes ripening indoors is nothing short of a miracle. Today, I’m diving into a crucial but often overlooked aspect of indoor tomato gardening: selecting the right FRP (Fiber Reinforced Plastic) containers for different tomato varieties. Let’s make sure your tomatoes get the perfect home they deserve!

    Diversity of Tomato Varieties

    Why FRP Containers?

    Before we get into specifics, let’s talk about why FRP containers are a fantastic choice for growing tomatoes. These containers are lightweight yet incredibly durable, offering excellent resistance to weather and UV rays. Their non-porous surface prevents soil from drying out too quickly, and they’re available in a plethora of shapes and sizes to suit any indoor garden setup.

    Matching Containers to Tomato Varieties

    Dwarf Varieties (Tiny Tim, Red Robin)

    Dwarf tomato plants are compact and bushy, making them perfect for smaller spaces. For these little gems, opt for FRP containers that are around 2-3 gallons. A cylindrical or square pot works well, providing enough root space without overwhelming your indoor garden.

    • Recommended Size: 2-3 gallons
    • Shape: Cylindrical or square
    • Tip: Ensure good drainage with pre-drilled holes or add a layer of gravel at the bottom.

    Determinate Varieties (Patio Princess, Celebrity)

    Determinate tomatoes grow to a fixed mature size, usually around 3-4 feet tall. They need a bit more room to spread their roots but don’t require as much depth as indeterminate varieties. FRP containers that are 5-7 gallons are ideal for these types.

    • Recommended Size: 5-7 gallons
    • Shape: Round or rectangular
    • Tip: Use a tomato cage or stakes to support the plant as it grows.

    Indeterminate Varieties (Big Boy, Beefsteak)

    These are the giants of the tomato world, continuously growing and producing fruit throughout the season. Indeterminate tomatoes need the largest containers you can manage indoors. Look for FRP containers that are at least 10 gallons or more.

    • Recommended Size: 10+ gallons
    • Shape: Deep and round
    • Tip: Provide strong support with a trellis or sturdy cage. These plants will climb and sprawl, needing ample space to thrive.

    Choosing the Right FRP Container Design

    While size is the most critical factor, the design also plays a significant role in the health and productivity of your tomato plants. Here are a few design features to consider:

    • Color: Lighter colors reflect heat, keeping the soil temperature regulated. Darker colors can absorb heat, which might be beneficial in cooler indoor environments.
    • Mobility: Containers with wheels make it easy to move your plants to catch the best sunlight throughout the day.

    Final Thoughts

    Tomato Tales: Unraveling The Diversity of Tomato Varieties” highlights the rich variety of tomatoes, including heirlooms and hybrids, each offering unique flavors, colors, and uses. For successful cultivation, the guide emphasizes choosing the right planter, preferably FRP (Fiber Reinforced Plastic) due to its durability, lightweight nature, and resistance to weather. Key growing tips include selecting the appropriate tomato variety for your climate, ensuring proper sunlight, and maintaining soil health with regular watering and fertilizing. By combining these insights, gardeners can enhance their tomato-growing experience, achieving a bountiful and diverse harvest.

    I hope this guide helps you pick the perfect FRP containers for your indoor tomato garden. Happy planting, and may your indoor space be filled with the delicious aroma of fresh tomatoes soon! Explore The Little world of tomatoes with Zardens

    Until next time, happy gardening! 🌿🍅


  • The Mysteries of Mushrooms🍄Benefits and Importance!

    The Mysteries of Mushrooms🍄Benefits and Importance!

    In the enchanting realm of nature, few things captivate the imagination quite like mushrooms. These humble fungi possess a mysterious allure, beckoning us to explore their hidden wonders. From the depths of dark forests to the nooks of our own backyards, mushrooms offer a world of intrigue and fascination waiting to be discovered. lets check The Mysteries of Mushrooms

    Step into the woods, and you’ll find yourself immersed in a fungal kingdom unlike any other. Here, beneath the dappling sunlight, mushrooms emerge from the forest floor like delicate jewels, each one a unique expression of nature’s creativity. Their diverse shapes, sizes, and colors paint a vibrant tapestry that dances with life and possibility.

    But mushrooms are not merely objects of beauty; they are guardians of the forest, playing vital roles in the delicate balance of ecosystems. As nature’s recyclers, they break down organic matter, turning fallen leaves and dead wood into rich soil that nourishes new life. In this way, mushrooms are the silent architects of renewal, quietly shaping the landscapes we cherish.

    Yet, beneath their serene exterior lies a world of intrigue and complexity. Mushrooms are masterful chemists, producing an array of compounds with astonishing properties. Some boast medicinal virtues, offering remedies for ailments both ancient and modern. Others possess psychedelic powers, unlocking doors to realms of consciousness beyond the ordinary. The sheer diversity of mushrooms and their effects is as captivating as it is awe-inspiring.

    But beware, for not all mushrooms are created equal. Among the dazzling array of species, lurk hidden dangers for the uninformed. Deadly toxins hide within innocuous-looking caps, waiting to ensnare the unwary. Thus, the pursuit of mushrooms becomes a delicate dance between fascination and caution, a journey of discovery tempered by respect for their power. visit our website –Zardens.com

    Unveiling the Mysterious World of Mushrooms

    Have you ever wondered what lies beneath the earth’s surface, hidden from plain sight, yet bursting with life and vitality? Enter the enchanting realm of mushrooms, where magic and mystery intertwine with science to create one of nature’s most fascinating organisms. In this exploration, we’ll delve into the anatomy and lifecycle of mushrooms, unraveling the secrets of these curious creations.

    The Anatomy of Mushrooms: Nature’s Tiny Architects

    Picture this: a damp forest floor, dappled sunlight filtering through the canopy above, and nestled among the fallen leaves and decaying wood, mushrooms emerge like miniature umbrellas, showcasing an array of shapes, sizes, and colors. But what exactly makes up these whimsical wonders?

    At the heart of every mushroom lies the mycelium, a network of thread-like strands that weave their way through the soil or substrate, tirelessly scavenging nutrients to sustain the fungal organism. Think of the mycelium as nature’s underground highway, facilitating the exchange of essential resources and serving as the foundation upon which mushrooms flourish.

    Aboveground, the mushroom’s fruiting body takes center stage, boasting an intricate architecture designed for reproduction. The cap, often adorned with gills, pores, or ridges, serves as a protective canopy for the spore-bearing surface beneath. Meanwhile, the stem provides support and stability, anchoring the mushroom firmly in place.

    The Lifecycle Dance of Mushrooms: A Tale of Growth and Decay

    Like characters in a timeless story, mushrooms undergo a cyclical journey of birth, growth, and demise, perpetuating the delicate balance of ecosystems worldwide. It all begins with the humble spore, a microscopic seed capable of germinating under the right conditions.

    Upon finding a suitable habitat, spores germinate, giving rise to delicate hyphae that intertwine and multiply, forming the intricate web of mycelium. As the mycelium matures, it sets the stage for the grand finale: the emergence of the fruiting body, aka the mushroom.

    With the onset of favorable environmental cues—think moist conditions and ample nutrients—the mycelium channels its energy into producing mushrooms, signaling the climax of its lifecycle. As mushrooms mature, they release spores into the surrounding environment, ensuring the continuation of their species.

    But alas, all good things must come to an end, and mushrooms are no exception. Once their reproductive mission is complete, mushrooms begin to senesce, their vibrant hues fading as they return to the earth from whence they came. Yet, even in decay, mushrooms play a vital role, serving as nature’s recyclers, breaking down organic matter and enriching the soil for future generations.

    Unraveling the Mysteries of Mushroom Magic

    From the depths of the forest floor to the culinary delights of gourmet cuisine, mushrooms captivate our imaginations and tantalize our taste buds. But beyond their aesthetic allure and gastronomic appeal lies a world of wonder waiting to be explored.

    So the next time you stumble upon a cluster of mushrooms during your woodland wanderings, take a moment to marvel at the intricate dance of life unfolding before your eyes. For within these humble fungi lies a story as old as time itself—a tale of resilience, adaptation, and the enduring beauty of nature’s design.

    The Magic of Fungi: Unsung Heroes of Ecosystems

    The Mysteries of Mushrooms

    Ever wandered through a forest and marveled at the diversity of life around you? Well, prepare to be awestruck by the hidden world beneath your feet – the realm of fungi. While often overlooked, fungi play a crucial role in the balance and health of ecosystems worldwide. Let’s dive into the fascinating world of these often underestimated organisms and uncover their ecological importance.

    The Fungal Network: Nature’s Recyclers

    Picture this: fallen leaves carpet the forest floor, and old trees stand tall, their time in the sun long gone. But fear not, for the fungi are here to save the day! Fungi are nature’s ultimate recyclers, breaking down dead organic matter like fallen leaves, wood, and even animal remains. Through the process of decomposition, fungi release essential nutrients back into the soil, nourishing plants and kickstarting the cycle of life anew. So, next time you spot a mushroom sprouting from the forest floor, remember to thank these unsung heroes for their recycling prowess.

    Symbiotic Superstars: Mycorrhizal Marvels

    Now, let’s talk teamwork. Fungi form symbiotic relationships with plants through mycorrhizae, intricate networks of fungal hyphae that intertwine with plant roots. In exchange for sugars produced by the plant through photosynthesis, mycorrhizal fungi provide essential nutrients like phosphorus and nitrogen, enhancing the plant’s growth and resilience. This mutually beneficial partnership is a testament to the power of cooperation in nature, showing that even the smallest organisms can have a big impact.

    Bioindicators of Environmental Health

    Imagine having a built-in alarm system for environmental health – well, fungi have just that! Certain species of fungi are highly sensitive to changes in their surroundings, making them valuable bioindicators of ecosystem health. By monitoring the presence and abundance of these indicator fungi, scientists can assess the impact of pollution, climate change, and habitat degradation on ecosystems. So, the next time you spot a rare mushroom species, you might just be witnessing nature’s warning signs in action.

    Conservation Challenges and Opportunities

    Despite their ecological importance, fungi face numerous threats, including habitat loss, pollution, and overexploitation. As habitats disappear and biodiversity declines, protecting fungi becomes more critical than ever. Fortunately, conservation efforts are underway worldwide to safeguard these vital organisms and the ecosystems they support. From establishing protected areas to promoting sustainable harvesting practices, there’s much we can do to ensure the continued survival of fungi and the ecosystems they inhabit.

    Unlocking the Potential: Fungi in Science and Medicine

    But wait, there’s more! Fungi aren’t just ecological superheroes – they’re also treasure troves of scientific and medicinal potential. From penicillin, the world’s first antibiotic, to the enzyme-rich fungi used in bioremediation, these organisms have revolutionized countless fields of research and industry. With ongoing studies exploring their role in biotechnology, medicine, and beyond, fungi continue to surprise and inspire us with their endless possibilities.

    The Flavorful World of Mushrooms

    Mushrooms, the hidden gems of the culinary world, offer a spectrum of flavors that can elevate any dish from mundane to magnificent. Dive into the delightful realm of mushroom varieties that are guaranteed to tantalize your taste buds and leave you craving for more.

    Champion of Umami: Shiitake Mushrooms

    Meet shiitake mushrooms, the undisputed champions of umami. These savory delights boast a rich, meaty flavor that adds depth to any dish they grace. Whether sautéed, stir-fried, or grilled, shiitakes impart a robust taste that will have you coming back for seconds.

    The Versatile Marvel: Portobello Mushrooms

    Say hello to portobello mushrooms, the versatile marvels of the fungi kingdom. With their hearty texture and earthy flavor, portobellos are perfect for grilling, stuffing, or even serving as a meat substitute in vegetarian dishes. Get creative and let these fungi unleash their culinary magic.

    Aromatic Delight: Chanterelle Mushrooms

    Step into the world of chanterelle mushrooms, where aroma reigns supreme. These golden beauties boast a delicate, fruity fragrance that can instantly transport you to a forest paradise. Whether added to risottos, pasta dishes, or simply sautéed with butter, chanterelles never fail to captivate with their enchanting scent.

    Discovering the Exotic: Morel Mushrooms

    Embark on a culinary adventure with morel mushrooms, the epitome of exotic flavor. With their distinctive honeycomb texture and nutty taste, morels add a gourmet touch to any dish. Whether enjoyed in a creamy sauce, folded into omelets, or simply sautéed with garlic, these elusive mushrooms are sure to leave a lasting impression.

    Savoring the Sensation: Oyster Mushrooms

    Indulge your senses with oyster mushrooms, the epitome of culinary delight. With their delicate flavor and velvety texture, oysters are a true sensation on the palate. Whether roasted, grilled, or added to soups and stews, these mushrooms promise a gastronomic experience like no other.

    The Enigmatic Appeal of Truffle Mushrooms

    Delve into the enigmatic world of truffle mushrooms, where luxury meets flavor in perfect harmony. Known for their intoxicating aroma and indulgent taste, truffles are prized by chefs and food enthusiasts alike. Whether shaved over pasta, infused into oils, or added to sauces, these culinary treasures never fail to impress with their unparalleled allure.

    Embracing the Magic of Mushrooms

    From the savory umami of shiitakes to the exotic allure of morels, the world of mushrooms is a treasure trove of flavor waiting to be explored. Whether you’re a culinary connoisseur or an adventurous home cook, these mushroom varieties are sure to elevate your dishes to new heights of deliciousness. So go ahead, embrace the magic of mushrooms, and let your taste buds embark on a journey they won’t soon forget.

    The World of Mushrooms: Choosing Your Cultivation Crew

    The Mysteries of Mushrooms

    Mushrooms, the magical fungi that add flavor, texture, and a dash of mystery to our plates. If you’re diving into the world of mushroom cultivation, you’re embarking on a journey filled with excitement and delicious rewards. But before you roll up your sleeves and dive into the dirt, let’s talk about choosing the right mushroom varieties to cultivate. After all, not all mushrooms are created equal, and picking the perfect fungi for your setup is key to a successful harvest.

    Understanding Your Environment

    Before you start tossing mushroom spores around like confetti, take a moment to assess your growing environment. Are you working with a cozy corner of your kitchen or a sprawling backyard? Different mushroom varieties thrive in different conditions, so knowing your space is crucial. For example, oyster mushrooms love a bit of fresh air, while shiitakes prefer a shady spot. Consider factors like temperature, humidity, and light availability to match your mushrooms with their ideal habitat.

    Know Your Mushrooms

    Just like people, mushrooms have their own personalities and preferences. Some are easygoing, while others can be a tad picky. Take time to research the varieties you’re interested in cultivating. Are they beginner-friendly, or do they require a bit more finesse? Look for mushrooms that align with your skill level and experience. For beginners, hearty varieties like button mushrooms or oysters are a great place to start. As you gain confidence, you can branch out into more exotic fungi like lion’s mane or maitake.

    Consider Your Culinary Needs

    While it’s tempting to jump straight into cultivating the most exotic mushrooms you can find, it’s essential to consider your culinary needs. Are you dreaming of gourmet mushroom risottos and creamy soups? Or are you simply looking for a tasty addition to your salads and stir-fries? Different mushroom varieties lend themselves to different dishes, so think about your favorite recipes before making your selection. For versatile options, consider mushrooms like shiitakes or creminis, which can elevate a wide range of dishes with their rich umami flavor.

    Size Matters: Scale of Cultivation

    Are you planning to cultivate mushrooms for personal use, or do you have dreams of supplying your local farmers’ market? The scale of your cultivation operation will influence the types of mushrooms you choose to grow. Some varieties, like shiitakes or oysters, are well-suited to small-scale cultivation and can thrive in modest setups like buckets or logs. If you’re thinking big, consider mushrooms like portobellos or king oysters, which can yield impressive harvests with the right space and resources.

    Experiment and Have Fun

    At the end of the day, mushroom cultivation is as much art as it is science. Don’t be afraid to get creative and experiment with different varieties and growing techniques. Mix and match mushrooms to create your own custom blend or try your hand at cultivating a rare and unusual species. The beauty of mushroom cultivation lies in its endless possibilities, so embrace the journey and have fun along the way. Whether you’re a seasoned mycophile or a curious novice, there’s always something new to discover in the fascinating world of fungi.

    Seek Advice and Resources

    As you embark on your mushroom cultivation journey, remember that you’re not alone. There’s a vast community of mushroom enthusiasts out there eager to share their knowledge and expertise. Whether you join an online forum, attend a local workshop, or reach out to fellow growers, don’t hesitate to seek advice and resources. Learning from others’ experiences can help you avoid common pitfalls and accelerate your success as a mushroom cultivator. So don’t be shy—reach out, ask questions, and let the mushroom community support you on your fungal adventure.

    Nature’s Hidden Treasures: Identifying Common Edible Mushroom Species

    Ah, the enchanting world of mushrooms! Venture into the woods, and you’ll find yourself surrounded by an array of shapes, sizes, and colors. But before you pluck any fungi for your next meal, it’s crucial to distinguish the edible from the poisonous. Let’s embark on a delightful journey to uncover some of nature’s delectable delights.

    Getting to Know Your Fungi Friends

    First things first, let’s talk about the basics. Edible mushrooms come in various forms, from the classic button mushrooms you find at the grocery store to the more exotic chanterelles and porcinis. But amidst this diversity, there are a few key features to look out for when identifying edible species.

    Cap Characteristics

    Imagine a tiny umbrella shielding a delicate creature from the rain—that’s the cap of a mushroom. Edible varieties often have smooth, convex caps with distinct colors ranging from white and cream to brown and even vibrant orange. Avoid mushrooms with scales, warts, or a slimy texture, as these could be indicators of toxicity.

    Gills and Pores

    Flip your mushroom friend over, and you’ll likely find a fascinating network of gills or pores. While some edible mushrooms boast intricate gill patterns, others feature tiny pores underneath their caps. Take note of their color and spacing—white to cream-colored gills are generally safe, while yellow, green, or purple hues should raise a red flag.

    Stalk Structure

    The stalk, or stem, provides support and stability for our fungal friends. Edible mushrooms typically have sturdy, firm stalks that are consistent in color and texture. Beware of mushrooms with hollow or fibrous stems, as these characteristics could indicate toxicity.

    Spotting the Safe Choices

    Now that we’ve covered the basics of mushroom identification, let’s dive into some common edible species you might encounter on your foraging adventures.

    Button Mushrooms (Agaricus bisporus)

    You’ve probably seen these humble fungi gracing supermarket shelves and pizza toppings. Button mushrooms are characterized by their creamy-white caps and pink gills when young, which gradually darken to brown as they mature. These versatile mushrooms boast a mild flavor, making them perfect for soups, stir-fries, and salads.

    Chanterelles (Cantharellus cibarius)

    Golden treasures hiding amidst the forest floor, chanterelles are prized for their fruity aroma and delicate flavor. Sporting vibrant orange caps with wavy edges, these mushrooms often grow in clusters near oak and beech trees. Their firm texture and peppery notes lend themselves beautifully to sauces, risottos, and omelets.

    Morel Mushrooms (Morchella spp.)

    Ah, the elusive morels—the crown jewels of spring foragers. With their distinctive honeycomb-like caps and earthy flavor, morel mushrooms are a true delicacy. They prefer to emerge after spring rains, often found near ash, elm, and poplar trees. Sauté them in butter or add them to pasta dishes for a gourmet touch.

    Porcini Mushrooms (Boletus edulis)

    Bold and meaty, porcini mushrooms are a favorite among culinary enthusiasts. Recognizable by their large, brown caps and thick stalks, these mushrooms have a rich, nutty flavor reminiscent of the forest floor. Whether dried or fresh, porcinis elevate any dish—from risottos and pastas to soups and sauces.

    Nature’s Pharmacy: Exploring the Medicinal Marvels of Mushrooms

    The Mysteries of Mushrooms

    Welcome, my fellow nature enthusiasts, to a journey through the enchanting world of mushrooms. Beyond their culinary delights, these fascinating fungi harbor a treasure trove of medicinal properties waiting to be discovered. Let’s embark on a whimsical exploration into the therapeutic wonders of mushrooms, shall we?

    A Natural Apothecary: The Healing Powers of Mushrooms

    Step into nature’s apothecary, where mushrooms reign supreme as potent healers. From ancient times to modern research, these humble fungi have been revered for their remarkable medicinal benefits. Whether brewed into teas, encapsulated in supplements, or incorporated into gourmet dishes, mushrooms offer a holistic approach to wellness that’s as delightful as it is effective.

    Immune Boosting Elixirs: Mushrooms as Guardians of Health

    Picture this: a cozy evening, sipping on a warm cup of mushroom tea, while your immune system receives a gentle boost. Yes, you heard it right! Mushrooms, such as reishi, shiitake, and maitake, are revered for their immune-modulating properties. Rich in polysaccharides and beta-glucans, these fungi act as guardians of health, fortifying our body’s defenses against pesky invaders.

    Stress-Busters and Mood Enhancers: Mushrooms for Mental Wellness

    In the hustle and bustle of modern life, finding moments of tranquility can feel like a distant dream. Fear not, for mushrooms come to the rescue yet again! Certain varieties, like lion’s mane and cordyceps, possess adaptogenic qualities that help combat stress and promote mental well-being. Say goodbye to those frazzled nerves and hello to a calmer, more centered you!

    Gut Health Guardians: Mushrooms Nourishing from Within

    Ah, the gut – our body’s bustling epicenter of health and vitality. It’s no secret that maintaining a happy gut is key to overall well-being, and mushrooms are here to lend a helping hand. With their prebiotic fibers and digestive enzymes, varieties like oyster and porcini support gut health, promoting optimal digestion and nutrient absorption. So go ahead, indulge in that savory mushroom stir-fry – your gut will thank you for it!

    Eco-Friendly Medicine: The Sustainable Appeal of Mushrooms

    As stewards of the earth, it’s only natural to seek out sustainable alternatives in our quest for wellness. Luckily, mushrooms fit the bill perfectly! Unlike traditional pharmaceuticals with their ecological footprint, mushrooms can be cultivated in eco-friendly ways, minimizing harm to the planet. So, by incorporating these fungi into our wellness routines, we not only nourish ourselves but also contribute to a healthier planet for generations to come.

    A Call to Adventure: Embracing Mushrooms in Your Wellness Journey

    Dear reader, as we conclude our exploration of the medicinal benefits of mushrooms, I extend to you a heartfelt invitation. Dive deeper into the magical realm of fungi, and discover the myriad ways they can enrich your life. Whether you’re seeking immune support, mental clarity, or simply a delicious addition to your meals, mushrooms stand ready to accompany you on your wellness journey. So go forth, my friend, and let the healing wonders of mushrooms illuminate your path to vibrant health and vitality!

    Exploring the Culinary World of Mushrooms

    Are you ready to embark on a flavorful journey through the world of mushrooms? Whether you’re a die-hard mushroom lover or just looking to expand your culinary horizons, these delicious recipes will surely tantalize your taste buds. From hearty stews to savory pastas, there’s a mushroom dish for every occasion. Let’s dive in and discover the magic of cooking with mushrooms!

    Creamy Mushroom Risotto: A Comforting Classic

    Picture this: creamy Arborio rice infused with the earthy flavor of mushrooms, topped with a sprinkle of freshly grated Parmesan cheese. It’s comfort food at its finest! Start by sautéing shallots and garlic until fragrant, then add sliced mushrooms and Arborio rice. Slowly incorporate warm broth, stirring constantly until the rice is tender and the mixture is luxuriously creamy. Finish with a generous dollop of butter and a handful of chopped parsley. Each spoonful is a taste of pure bliss!

    Garlic Butter Mushrooms: A Simple Yet Satisfying Side Dish

    Looking for a quick and easy way to elevate any meal? Look no further than garlic butter mushrooms. Simply sauté sliced mushrooms in a generous amount of butter until golden brown, then add minced garlic and a sprinkle of salt and pepper. The result? A mouthwatering side dish that pairs perfectly with grilled steak, roasted chicken, or even just a simple green salad. It’s the perfect combination of simplicity and flavor!

    Stuffed Portobello Mushrooms: A Crowd-Pleasing Appetizer

    Impress your guests with these elegant stuffed Portobello mushrooms. Start by removing the stems and gills from large Portobello caps, then brush them with olive oil and season with salt and pepper. Next, fill each cap with a savory mixture of breadcrumbs, garlic, herbs, and grated cheese. Bake until the mushrooms are tender and the filling is golden brown and bubbling. Whether you’re hosting a dinner party or just looking for a tasty appetizer, these stuffed mushrooms are sure to be a hit!

    Mushroom and Spinach Frittata: A Wholesome Breakfast Option

    Start your day off right with a hearty mushroom and spinach frittata. Simply sauté sliced mushrooms and baby spinach until wilted, then pour beaten eggs over the top. Cook until the edges are set, then transfer to the oven to finish cooking through. The result is a fluffy and flavorful frittata that’s perfect for breakfast, brunch, or even a light dinner. Serve it alongside some crusty bread and fresh fruit for a complete meal that will keep you fueled all day long!

    Mushroom and Lentil Soup: A Nourishing Bowl of Comfort

    There’s nothing quite like a warm bowl of soup to comfort the soul, and this mushroom and lentil soup does not disappoint. Start by sautéing onions, carrots, and celery until softened, then add sliced mushrooms and dried lentils. Pour in vegetable broth and simmer until the lentils are tender and the flavors have melded together. Finish with a splash of balsamic vinegar and a sprinkle of fresh parsley for a soup that’s both hearty and nutritious. Serve it with a crusty loaf of bread for the ultimate comfort meal!

    Mushroom and Goat Cheese Pizza: A Gourmet Twist on a Classic

    Take your pizza game to the next level with this gourmet mushroom and goat cheese pizza. Start with a homemade or store-bought pizza crust, then top it with sautéed mushrooms, crumbled goat cheese, caramelized onions, and a drizzle of balsamic glaze. Bake until the crust is golden brown and crispy, then finish with a sprinkle of fresh arugula for a peppery bite. Each slice is a delicious combination of flavors and textures that will have you coming back for more!

    The Future: Fungal Medicine Research

    The Mysteries of Mushrooms

    Hey there, fellow science enthusiasts! Let’s embark on a journey into the fascinating realm of fungal medicine research. As we delve into the depths of this field, we uncover a world brimming with promise and potential. So, buckle up and get ready to explore the future prospects that await us!

    Breaking Barriers: Advancements in Antifungal Therapies

    Picture this: a world where fungal infections are no longer a cause for concern. Thanks to groundbreaking research, we’re edging closer to making this a reality. Scientists are tirelessly working on developing new and improved antifungal therapies that promise to revolutionize the way we combat these pesky infections. From novel drug compounds to innovative treatment modalities, the possibilities are endless. Say goodbye to stubborn fungal infections – help is on the way!

    Harnessing Nature’s Arsenal: Exploring Fungal Bioactive Compounds

    Nature has always been our greatest ally in the fight against disease, and fungi are no exception. These remarkable organisms produce an array of bioactive compounds with incredible therapeutic potential. From antibiotics to anticancer agents, fungi are proving to be veritable treasure troves of medicinal compounds. Researchers are busy unlocking the secrets of these fungal bioactive compounds, with the aim of harnessing their power to develop new drugs and treatments. Who knew that mushrooms could hold the key to combating some of the most challenging diseases of our time?

    A Microbial Symphony: Unraveling the Role of Fungal Microbiota

    Move over, gut bacteria – fungal microbiota are taking center stage in the world of microbiome research. These diverse communities of fungi play a crucial role in maintaining our health and wellbeing, influencing everything from digestion to immunity. With advances in sequencing technologies, scientists are now able to delve deeper into the intricate workings of the fungal microbiota. By understanding how these fungi interact with our bodies, we can pave the way for personalized approaches to healthcare that target the microbiome. It’s time to embrace the fungal side of the microbiome and unlock its full potential!

    In conclusion, the future of fungal medicine research is brimming with excitement and possibility. From innovative antifungal therapies to the exploration of fungal bioactive compounds and the unraveling of the fungal microbiota, there’s no shortage of avenues to explore. So, whether you’re a scientist, a healthcare professional, or simply someone with a curious mind, keep an eye on this fascinating field – the best is yet to come! visit our website –Zardens.com

  • 9 Most Common Garden Watering System: The Right One for you!


     Most Common Garden Watering System

    The title “9 Most Common Watering System: The Right One for your Garden” suggests that there are various commonly used methods for watering plants, each with its own characteristics and benefits. By presenting nine different watering systems, the title implies that there’s a diverse range of options available to gardeners.

    The phrase “The Right One for your Garden” emphasizes the importance of selecting the watering system that best suits the specific needs and conditions of your garden. It acknowledges that what works well for one garden might not be the best choice for another. Therefore, the title suggests that by exploring these nine common watering systems, you can find the one that aligns most closely with your garden’s requirements, helping you to achieve optimal plant growth and health. Let’s explore to find the Best one for you!


    Hand Watering: a Personal Touch to Your Garden

    Hand watering—there’s something therapeutic about it, isn’t there? In a world where automation often reigns supreme, there’s a special charm in taking the time to water your garden by hand. Let’s dive into the art and science of hand watering, exploring its benefits, techniques, and why it’s a beloved practice among gardeners worldwide.

    The Joys of Hand Watering

    Picture this: it’s a warm summer evening, and you’re strolling through your garden, watering can in hand. As you carefully shower each plant, you can’t help but feel a deep sense of connection to nature. Hand watering allows you to interact with your plants on a personal level, fostering a deeper appreciation for their beauty and vitality.

    The Art of Hand Watering

    Now, let’s talk technique. When hand watering your garden, it’s crucial to do so with care and precision. Aim to water the base of each plant, ensuring that the roots receive an ample supply of moisture. Take your time, moving methodically from one plant to the next, and avoid splashing water onto the leaves, as this can lead to fungal diseases.

    The Benefits of Hand Watering

    While automated irrigation systems have their perks, there’s no denying the unique advantages of hand watering. For one, it allows you to tailor your watering regimen to the specific needs of each plant. Plus, hand watering provides an opportunity to closely inspect your garden, allowing you to spot any issues such as pests or diseases before they escalate.

    Conserve Water, Save Money

    In addition to its therapeutic benefits, hand watering can also help you save water and money in the long run. By watering only where needed and avoiding runoff, you can minimize water waste and lower your utility bills. Plus, there’s something satisfying about knowing that you’re doing your part to conserve this precious resource.

    Finding Your Rhythm

    Like any skill, mastering the art of hand watering takes time and practice. Experiment with different watering techniques and schedules until you find what works best for your garden. Pay attention to factors such as soil type, weather conditions, and the individual needs of your plants. Before you know it, you’ll develop a rhythm that keeps your garden thriving year-round.

    Hand Watering Tips and Tricks

    • Timing is Key: Water your garden early in the morning or late in the evening to minimize evaporation and ensure maximum absorption.
    • Mulch Matters: Apply a layer of mulch around your plants to help retain moisture and reduce the need for frequent watering.
    • Watch the Weather: Adjust your watering schedule based on rainfall and humidity levels to avoid overwatering or underwatering your plants.
    • Stay Consistent: Establish a regular watering routine and stick to it, even during periods of rain or drought. Consistency is key to maintaining a healthy, vibrant garden.


    The Magic of Drip Irrigation

    Tired of lugging around heavy watering cans or wrangling unruly hoses in your garden? Say hello to your new best friend: drip irrigation! This nifty watering system is like having a personal assistant for your plants, delivering water right where it’s needed, when it’s needed. Let’s dive into the wonderful world of drip irrigation and discover how it can transform your gardening experience.

     Most Common Garden Watering System

    The Lowdown on Drip Irrigation

    Picture this: instead of flooding your entire garden with water, drip irrigation delivers a slow and steady trickle directly to the roots of your plants. It’s like giving them a refreshing drink without any wastage. This targeted approach not only conserves water but also prevents weeds from sprouting up between your precious plants. With drip irrigation, it’s all about efficiency and precision.

    How Does It Work?

    Think of drip irrigation as a series of tiny water highways snaking through your garden. A network of tubes and emitters is strategically placed around your plants, ensuring that each one gets its fair share of hydration. These emitters release water in controlled drips, mimicking the natural rainfall that your plants love so much. It’s like having your own miniature rain shower, customized for your garden’s needs.

    The Perks of Drip Irrigation

    Let’s talk perks, shall we? First and foremost, drip irrigation is a game-changer when it comes to water conservation. By delivering water directly to the roots, it minimizes evaporation and runoff, ensuring that every precious drop counts. Plus, since the water is targeted at the base of each plant, there’s less chance of moisture-related diseases like powdery mildew taking hold. Say goodbye to soggy leaves and hello to happy, healthy plants!

    Prose and Cons of Drip Irrigation

    Now, let’s weigh the pros and cons of this common garden watering system. On the bright side, drip irrigation saves water, promotes healthy plant growth, and reduces the need for manual watering. It’s a win-win for both you and your garden! However, setting up a drip irrigation system can be a bit daunting for beginners, and it may require some initial investment in materials. Additionally, regular maintenance is key to keeping your system running smoothly, as clogged emitters can put a damper on your gardening dreams.

    Tips for Getting Started

    Ready to take the plunge into the world of drip irrigation? Here are a few tips to help you get started:

    1. Plan Your Layout: Before you start digging, sketch out a rough layout of your garden and decide where to place your irrigation lines. Aim for even coverage and consider factors like plant spacing and water requirements.
    2. Choose the Right Components: There are many types of drip irrigation kits available, so do your research and choose the one that best suits your garden’s needs. Look for high-quality materials that will withstand the elements and provide consistent water flow.
    3. Don’t Forget to Test: Once your system is up and running, take the time to test it out and make any necessary adjustments. Check for leaks, uneven watering, or clogged emitters, and tweak your setup as needed to ensure optimal performance.


    Watering Routine with Soaker Hoses

    Are you tired of dragging around cumbersome hoses or standing for hours with a watering can? Say hello to your garden’s new best friend: soaker hoses! These unassuming strips of porous material are about to change the way you water your plants forever.

    What Are Soaker Hoses, Anyway?

    Soaker hoses are like the zen masters of watering systems. They work on a simple principle: they ooze water slowly and steadily along their length, delivering moisture right where it’s needed – at the roots. No more wasteful spraying or runoff, just efficient, targeted hydration for your precious plants.

    The Lazy Gardener’s Dream Come True

    Imagine this: you hook up your soaker hose, turn on the tap, and then sit back with a cool drink while your garden gets watered automatically. It’s like having a personal assistant for your plants – except this one never complains or calls in sick.

    Pros of Soaker Hoses

    Let’s talk benefits, shall we? First off, soaker hoses are incredibly efficient. Because they deliver water directly to the soil, there’s minimal evaporation or runoff, which means you save water and money. Plus, since the foliage stays dry, you can say goodbye to pesky fungal diseases like powdery mildew.

    Cons to Consider

    Now, before you go rushing out to buy a truckload of soaker hoses, let’s address the cons. One potential downside is that soaker hoses have a limited range – typically around 100 feet. If you have a sprawling garden, you might need multiple hoses or a different watering solution for those far-flung corners.

    Installing Soaker Hoses: Easy-Peasy Lemon Squeezy

    You might be thinking, “But I’m not exactly Bob the Builder – can I handle installing soaker hoses?” Fear not, my friend, for this is one DIY project even a houseplant could master. Simply lay the hose along the base of your plants, secure it with stakes if needed, and connect it to your water source. Voila! You’re officially a watering wizard.

    Common Garden Watering System: Soaker Hoses to the Rescue

    When it comes to the common garden watering system, soaker hoses are the unsung heroes. They take the hassle out of hydration, leaving you more time to enjoy the fruits (and veggies) of your labor. Whether you’re a novice gardener or a seasoned pro, soaker hoses deserve a prime spot in your gardening arsenal. So, what are you waiting for? Let’s get soaking!


    Garden Care: The Magic of Sprinkler Systems

    Maintaining a lush, vibrant garden is every green thumb’s dream, but let’s face it, watering can sometimes feel like a chore. That’s where sprinkler systems come into play, turning mundane watering tasks into a breeze. Let’s dive into the wonderful world of sprinkler systems and discover how they’re transforming the way we care for our gardens.

     Most Common Garden Watering System

    The Basics: How Sprinkler Systems Work

    Picture this: a hot summer day, and your garden is thirsting for a drink. Enter the sprinkler system, the hero of the hour. These ingenious contraptions work by distributing water evenly across your garden, mimicking the gentle rain Mother Nature provides. With a network of pipes and strategically placed nozzles, they ensure every inch of your garden receives the hydration it needs to thrive.

    Types of Sprinkler Systems: Finding the Perfect Fit

    One size doesn’t fit all when it comes to sprinkler systems. From oscillating sprinklers to drip irrigation, there’s a wide array of options to suit every garden’s needs. Oscillating sprinklers sway back and forth like a mesmerizing dance, covering large areas with ease. Drip irrigation, on the other hand, delivers water directly to the roots, conserving water and minimizing waste. Whether you have a sprawling lawn or a cozy courtyard, there’s a sprinkler system waiting to cater to your garden’s needs.

    The Pros and Cons of Sprinkler Systems

    Let’s weigh the pros and cons of incorporating a sprinkler system into your garden oasis. On the plus side, these systems save you time and effort, automating the watering process so you can sit back and relax. Say goodbye to dragging hoses around and hello to more leisure time in your garden retreat. However, it’s essential to consider the cons too. Sprinkler systems can be an investment upfront, both in terms of installation and maintenance costs. Additionally, they may not be suitable for all garden layouts, especially if you have delicate plants that require precise watering.

    Pros of Sprinkler Systems:

    • Time-Saving: With automated watering, you can spend less time fussing over your garden and more time enjoying its beauty.
    • Efficiency: Sprinkler systems distribute water evenly, reducing the risk of overwatering or underwatering your plants.
    • Versatility: From lawns to flower beds, sprinkler systems can adapt to various garden layouts, ensuring every corner receives the attention it deserves.

    Cons of Sprinkler Systems:

    • Cost: The initial investment and ongoing maintenance costs of sprinkler systems can be prohibitive for some gardeners.
    • Limited Precision: While efficient, sprinkler systems may not provide the precision needed for certain plants or garden layouts.
    • Dependency on Water Supply: Sprinkler systems rely on a steady water supply, which can be a concern in areas prone to drought or water restrictions.


    The turning heads: Olla Irrigation

    Welcome, green thumbs and plant enthusiasts, to the world of innovative gardening techniques! Today, we’re diving deep into the realm of olla irrigation, a method that’s turning heads (and hydrating roots) in the gardening community.

    What Exactly is Olla Irrigation?

    Imagine a magical clay pot buried in your garden, quietly delivering water directly to your plants’ roots. That’s olla irrigation in a nutshell! Derived from ancient agricultural practices, this method relies on porous clay pots buried in the soil to gradually release water, providing a consistent source of hydration to your thirsty plants.

    The Beauty of Olla Irrigation in Action

    Picture this: a hot summer day, the sun beating down on your garden oasis. While traditional watering methods can lead to water loss through evaporation, olla irrigation operates on a more efficient wavelength. By delivering water directly to the root zone, it minimizes waste and ensures that every drop counts. Plus, it’s a hands-off approach once set up—perfect for busy gardeners or forgetful waterers (we’ve all been there!).

    Prose and Cons of Olla Irrigation

    Pros: Say goodbye to daily watering rituals and hello to a thriving garden ecosystem! Olla irrigation promotes healthy root growth, reduces water usage, and even helps deter weeds by targeting moisture where it’s needed most. Plus, its low-tech design means minimal maintenance and a more sustainable approach to gardening.

    Cons: While olla irrigation offers numerous benefits, it’s not without its limitations. In particularly dry climates, you may need to refill the pots more frequently to ensure continuous hydration for your plants. Additionally, the initial setup can be a bit time-consuming, requiring careful placement of the ollas and monitoring to find the optimal watering schedule for your garden.

    How to Implement Olla Irrigation in Your Garden

    Ready to take the plunge into olla irrigation? Here’s a step-by-step guide to get you started:

    1. Choose Your Ollas: Select porous clay pots or DIY your own using terracotta containers. Aim for pots with a wide base to maximize water storage.
    2. Dig In: Bury your ollas strategically throughout your garden, ensuring they’re placed near your plants’ root zones. Leave the top portion exposed for easy refilling.
    3. Fill ‘Em Up: Once your ollas are in place, fill them with water and watch as the magic begins! Monitor the moisture levels in your soil and adjust the frequency of refills as needed.
    4. Sit Back and Relax: With olla irrigation handling the heavy lifting, you can kick back, relax, and enjoy a flourishing garden with minimal effort.


    Revolutionizing Your Garden with Automatic Timers

    If you’ve ever found yourself in a bind, torn between watering your plants and catching the latest episode of your favorite show, fret no more! Automatic timers are here to save the day, giving you the freedom to enjoy your hobbies while keeping your garden lush and thriving.

     Most Common Garden Watering System

    Convenience at Your Fingertips

    Gone are the days of dragging hoses around the yard or anxiously checking the weather forecast. With automatic timers, you can set it and forget it, allowing the system to do all the work for you. Whether you’re a busy bee or simply forgetful, these timers ensure your garden stays hydrated without the hassle.

    Efficiency Meets Effectiveness

    Say goodbye to wasted water and hello to efficiency! Automatic timers deliver just the right amount of water at the optimal times, preventing overwatering or underwatering. By syncing with weather patterns and plant needs, these timers keep your garden in tip-top shape while conserving water—a win-win for both you and the environment.

    Savoring the Sweet Fruits of Labor

    Imagine coming home after a long day to be greeted by a flourishing garden, all thanks to your trusty automatic timer. With minimal effort on your part, you can revel in the beauty of your surroundings and take pride in your green thumb prowess. From vibrant flowers to bountiful harvests, the possibilities are endless when you let technology lend a hand.

    The Pros and Cons Unveiled

    Pros:

    • Effortless watering: Set it and forget it, allowing you to focus on other tasks.
    • Water conservation: Prevents overwatering and saves water by delivering just the right amount.
    • Customizable schedules: Tailor watering times to suit your plants’ needs and your lifestyle.
    • Increased plant health: Ensures consistent hydration, leading to healthier, more vibrant growth.

    Cons:

    • Initial investment: Automatic timers may require upfront costs for installation and setup.
    • Maintenance: Periodic checks and adjustments may be needed to ensure optimal performance.
    • Dependency on technology: Power outages or malfunctions could disrupt watering schedules.
    • Limited flexibility: Some plants may require manual watering for specific care needs.


    Unleashing the Magic of Wicking Beds in Your Garden

    Tired of constantly watering your garden? Say hello to wicking beds! These ingenious creations are a game-changer in the world of gardening, promising lush greenery with minimal effort. Let’s dive into what makes them so special and how they can revolutionize your gardening experience.

    What Are Wicking Beds?

    Imagine a self-watering oasis for your plants, and you’ve got yourself a wicking bed. These beds work on a simple principle: they provide a reservoir of water at the bottom, which is then wicked up to the soil through capillary action. Essentially, your plants help themselves to water whenever they need it, ensuring they stay hydrated without you having to lift a finger.

    How Do They Work?

    Here’s the lowdown: at the base of the wicking bed lies a water reservoir, typically created using a waterproof barrier. This reservoir is filled with water, which is then drawn up into the soil above through a wicking medium, such as gravel or a fabric wick. As the soil dries out, it naturally pulls up more water from the reservoir, keeping your plants happy and hydrated.

    Why Choose Wicking Beds Over Common Garden Watering Systems?

    Sure, traditional watering methods get the job done, but wicking beds take it to the next level. With common garden watering systems, you’re often left at the mercy of Mother Nature or forced to stick to a strict watering schedule. But with wicking beds, you can kiss those worries goodbye. These beds provide a consistent moisture level to your plants, reducing the risk of both under and overwatering. Plus, they’re incredibly efficient, requiring less water overall compared to conventional methods.

    Pros and Cons of Wicking Beds

    Pros:

    1. Water Efficiency: Wicking beds use water more efficiently, reducing wastage and saving you money in the long run.
    2. Low Maintenance: Once set up, wicking beds require minimal maintenance, giving you more time to sit back and enjoy your garden.
    3. Ideal for All Gardens: Whether you have a small balcony garden or a sprawling backyard, wicking beds can be tailored to suit any space.

    Cons:

    1. Initial Setup: Setting up a wicking bed requires some initial effort and investment, including constructing the bed and installing the water reservoir.
    2. Limited Depth: The depth of a wicking bed can be limited by the height of the reservoir, which may not be ideal for deep-rooted plants.
    3. Potential for Algae Growth: If not properly managed, the water reservoir in wicking beds can become a breeding ground for algae, requiring periodic maintenance.


    Unveiling the Magic: Rainwater Harvesting Systems

    Welcome, garden enthusiasts! Today, let’s dive into the fascinating world of rainwater harvesting systems. Picture this: nature’s gift pouring down from the heavens, ready to be harnessed for your lush green oasis. Exciting, right? Well, buckle up because we’re about to explore how these systems work their magic, why they’re a game-changer for your garden, and some tips to get you started.

     Most Common Garden Watering System

    How Rainwater Harvesting Systems Work

    Imagine your garden as a thirsty traveler in a desert, and rainwater harvesting systems as its trusty oasis. These systems are like ingenious water collectors, eagerly waiting to catch every precious drop from the sky. From rooftop catchment systems to simple rain barrels, there’s a myriad of ways to channel the rain’s bounty straight to your garden’s roots.

    Why Rainwater Harvesting is a Gardener’s Best Friend

    Now, let’s talk perks. First off, it’s eco-friendly. By tapping into Mother Nature’s waterworks, you’re reducing your carbon footprint and easing the strain on local water supplies. Plus, rainwater is pure gold for your plants. Unlike tap water loaded with chemicals, rainwater is nature’s own distilled elixir, packed with nutrients that your garden craves.

    The Common Garden Watering System: A Match Made in Gardening Heaven

    Ah, the Common Garden Watering System—where rainwater harvesting meets efficiency in watering. It’s like the ultimate power couple, destined to keep your garden thriving while saving you time and money. With a well-designed rainwater harvesting setup, you can seamlessly integrate it into your watering routine, ensuring your plants get the hydration they need, when they need it.

    Pros and Cons of Rainwater Harvesting Systems

    Now, let’s get real and weigh the pros and cons. On the bright side, rainwater harvesting is a sustainable solution that puts you in control of your water supply. It’s cost-effective, reduces runoff and erosion, and can even help mitigate flooding. However, like any superhero, it’s not without its kryptonite. Setting up a system can require an initial investment of time and money, and depending on your location, you might face regulatory hurdles. But fear not, with a bit of planning and know-how, these obstacles can easily be overcome.

    Tips for Getting Started with Rainwater Harvesting

    Ready to take the plunge? Here are some handy tips to kickstart your rainwater harvesting journey:

    1. Assess Your Space: Take stock of your roof size, gutter system, and available space for storage tanks. Every drop counts!
    2. Choose Your Setup: From DIY rain barrels to professionally installed systems, explore options that suit your budget and gardening needs.
    3. Get the Gear: Invest in quality components like downspout diverters, filters, and storage tanks to ensure optimal performance and water quality.
    4. Stay Legal: Familiarize yourself with local regulations regarding rainwater harvesting to avoid any legal hiccups down the line.
    5. Maintenance Matters: Regularly inspect and clean your system to keep it running smoothly and prevent any clogs or contamination.

    With these tips up your sleeve, you’ll be well on your way to becoming a rainwater harvesting guru in no time, and to get customised Planter for your garden in just one click- Zardens


    Hydroponic Systems: Revolutionizing Gardening

    Welcome to the wonderful world of hydroponic systems, where gardening takes on a whole new meaning! If you’ve ever dreamed of growing lush, vibrant plants without soil, then you’re in for a treat. Let’s dive into this innovative approach to gardening and discover how it’s changing the game for green thumbs everywhere.

    What Exactly is Hydroponics?

    Forget everything you know about traditional gardening because hydroponics tosses soil out the window. Instead, plants grow in a nutrient-rich water solution, making it a Common Garden Watering System with a twist. Picture your plants happily soaking up all the nutrients they need without any messy soil involved.

    The Beauty of Hydroponic Setup

    Setting up a hydroponic system is like creating a miniature oasis for your plants. Think sleek, space-saving designs that can fit in any corner of your home. Whether you opt for a simple water reservoir or a more complex setup with pumps and tubes, the possibilities are endless. Plus, it’s a fantastic conversation starter for when guests come over – who wouldn’t want to marvel at your futuristic garden?

    Benefits Galore: Why Hydroponics Rocks

    Now, you might be wondering, “What’s the big deal about growing plants without soil?” Well, let me tell you, the benefits are aplenty! Firstly, say goodbye to weeds invading your precious garden space. Without soil, there’s no room for those pesky intruders to take root. Secondly, hydroponic systems use water more efficiently, making them an eco-friendly choice for conscientious gardeners. And let’s not forget about the accelerated growth rates – your plants will be flourishing in no time!

    Pro Tips for Hydroponic Success

    Ready to take your gardening game to the next level? Here are some handy tips to ensure your hydroponic setup thrives:

    1. Choose the Right System: With options like Deep Water Culture, Nutrient Film Technique, and Ebb and Flow, it’s essential to pick a system that suits your space and needs.
    2. Monitor Nutrient Levels: Keep an eye on your nutrient solution’s pH and nutrient levels to ensure your plants are getting the right balance of essential elements.
    3. Maintain Proper Lighting: Since your plants won’t be basking in the sun’s rays, invest in quality grow lights to mimic natural sunlight and promote healthy growth.
    4. Stay Diligent with Cleaning: Regularly clean your system to prevent algae buildup and ensure optimal nutrient absorption for your plants.

    The Future of Gardening is Here

    Hydroponic systems are more than just a trendy gardening fad – they’re a glimpse into the future of sustainable agriculture. Whether you’re a seasoned gardener looking to shake things up or a newbie with a green thumb, exploring the world of hydroponics is sure to inspire and delight. So why wait? Dive in, get your hands dirty (or not, in this case), and watch your garden thrive like never before!


    A chart Showing Major pros & Cons with useful types of gardening

     Most Common Garden Watering System
    Irrigation MethodProsConsUseful Type of Gardening
    Hand Watering– Precise control over water distribution– Time-consumingContainer gardening, small gardens
    – Suitable for delicate plants– Labor-intensive
    Drip Irrigation– Water-efficient– Initial setup costVegetable gardens, row crops
    – Reduces weed growth– Requires regular maintenance
    Soaker Hoses– Water-efficient– Can be prone to cloggingFlower beds, vegetable gardens
    – Low pressure reduces water runoff– May require periodic replacement
    Sprinkler Systems– Covers large areas efficiently– Can lead to water wastageLawns, large gardens
    – Suitable for overhead watering– Prone to evaporation
    Olla Irrigation– Water-efficient– Limited coverage areaRaised beds, container gardening
    – Self-regulating– Requires periodic refilling
    Automatic Timers– Convenient scheduling– Initial setup and programmingAll types of gardening
    – Consistent watering– Dependency on power supply
    Wicking Beds– Conserves water– Limited to certain bed typesRaised beds, container gardening
    – Low maintenance– Not suitable for all plants
    Rainwater Harvesting Systems– Sustainable– Initial setup costAll types of gardening
    – Reduces reliance on mains water– Requires space for storage
    Hydroponic Systems– Efficient water usage– Requires technical knowledgeIndoor gardening, limited space
    – Faster plant growth– Initial setup cost
    Each method has its own set of advantages and limitations, making them suitable for different types of gardening and depending on specific needs and preferences.Get customised Planter for your garden in just one click- Zardens


  • “From Seed to Harvest: A Seasonal Guide to Growing Vegetables”
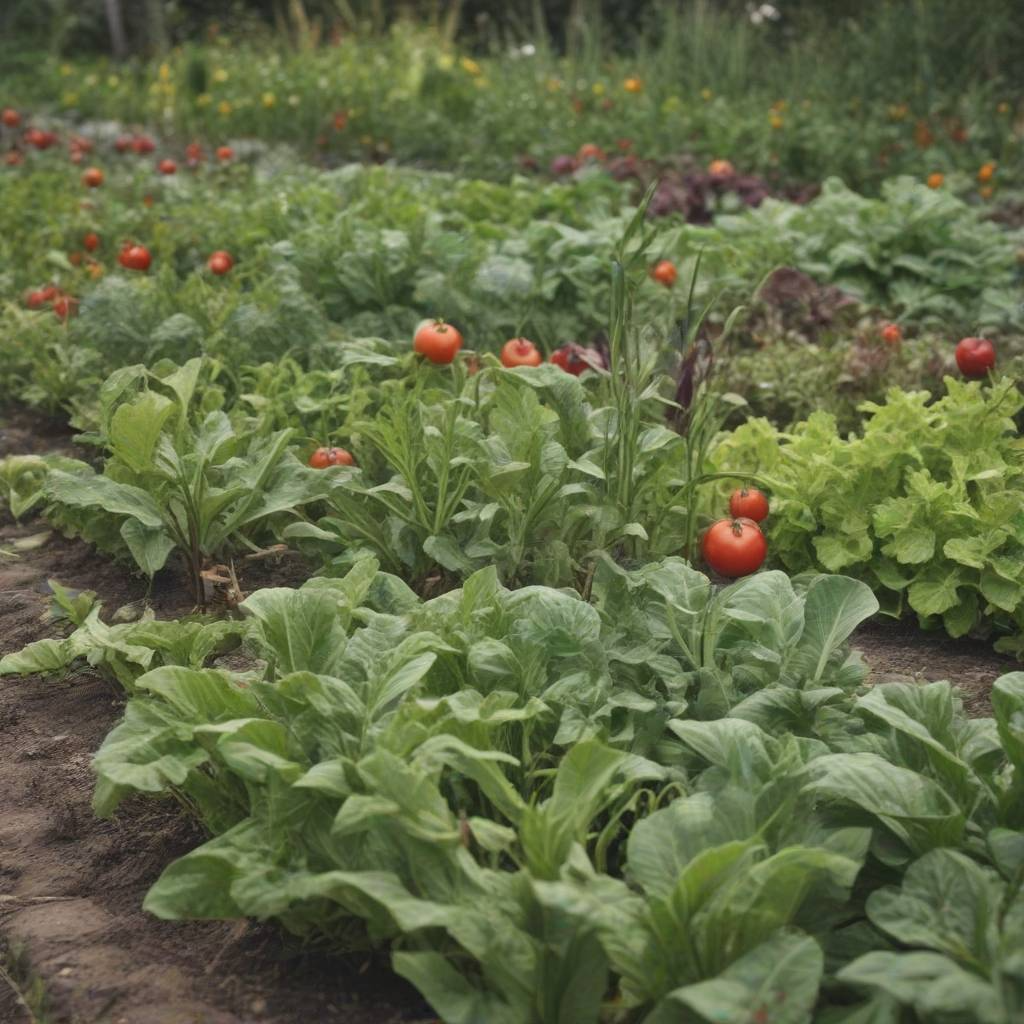
    “From Seed to Harvest: A Seasonal Guide to Growing Vegetables”

    Welcome to our comprehensive guide to growing vegetables, where we embark on a journey “From Seed to Harvest.” This seasonal handbook is your trusted companion, navigating you through the intricate process of cultivating a bountiful garden. From the tender beginnings of sowing seeds to the joyous culmination of harvest, we delve into every stage with precision and care. this guide offers invaluable insights, tips, and techniques to ensure your vegetable patch thrives throughout the seasons. Join us as we explore the art and science of cultivating nature’s bounty, Guide to Growing Vegetables.

    Guide to Growing Vegetables showing seeds

    Choosing the Right Seeds: Factors to consider for success

    Embarking on the journey of growing your own vegetables is like embarking on a culinary adventure right in your backyard. But before you can reap the harvest, you need to start with the right seeds. Choosing the perfect seeds can be a daunting task, but fear not! We’ve got you covered with some handy tips to ensure your vegetable garden thrives.

    Quality Over Quantity: The Seed Selection Dilemma

    When it comes to choosing seeds for your vegetable garden, quality should always trump quantity. Sure, it might be tempting to grab a handful of bargain seeds, but remember, you get what you pay for. Opt for reputable seed suppliers known for their high-quality seeds. Your future veggies will thank you for it!

    Know Your Zone: Climate Considerations for Seed Success

    One of the most crucial factors to consider when selecting seeds for your vegetable garden is your climate zone. Different vegetables thrive in different environments, so it’s essential to choose seeds that are suited to your specific climate. Do a little research or consult with local gardening experts to determine which vegetables are best suited to your zone.

    Space Matters: Matching Seeds to Your Garden’s Size

    Before you start stocking up on seeds, take a good look at your vegetable garden space. Consider factors like available sunlight, soil quality, and available space. Some vegetables, like sprawling pumpkins or zucchinis, require plenty of room to spread out, while others, like carrots or lettuce, can thrive in smaller spaces. Choose seeds that match the size and layout of your garden to maximize your harvest potential.

    Timing Is Everything: The Importance of Planting Dates

    In the world of vegetable gardening, timing is everything. Different vegetables have different planting and harvesting seasons, so it’s crucial to choose seeds that align with your local climate and planting schedule. Consider factors like frost dates and average temperatures to ensure you’re planting your seeds at the optimal time for success. After all, nobody wants to be harvesting tomatoes in the dead of winter!

    Consider Your Culinary Needs: Choosing Vegetables You’ll Love

    While it’s essential to consider factors like climate and space when selecting seeds for your vegetable garden, don’t forget to think about your culinary preferences too! After all, there’s no point in growing vegetables you won’t enjoy eating. Take some time to think about which vegetables you and your family love to eat, and choose seeds accordingly. Whether you’re a fan of crunchy cucumbers, sweet cherry tomatoes, or spicy peppers, there’s a vegetable out there for everyone.

    Embrace Diversity: The Beauty of Variety in Your Garden

    Variety is the spice of life, and the same goes for your vegetable garden! Don’t be afraid to mix things up and experiment with different types of vegetables. Not only does planting a diverse range of vegetables add visual interest to your garden, but it also helps promote biodiversity and can even help prevent pests and diseases. So go ahead, plant those heirloom tomatoes next to your rainbow chard and watch your garden come to life with color and flavor.

    Stay Organized: Keep Track of Your Seed Selections

    With so many factors to consider when selecting seeds for your vegetable garden, it’s essential to stay organized. Keep track of which seeds you’ve planted, when you planted them, and any other relevant information to help you stay on top of your gardening game. Consider keeping a gardening journal or using a gardening app to help you stay organized and ensure your vegetable garden stays thriving all season long.

    Preparing Healthy Soil for Optimal Growth

    Guide to Growing Vegetables showing soil preperation

    Hey there, green thumbs! Are you ready to dive into the dirt and cultivate some veggie magic? Well, before you start planting those juicy tomatoes or crisp carrots, let’s talk about the unsung hero of every thriving garden: the soil. Yep, that’s right! It’s time to roll up those sleeves and get down to the nitty-gritty of preparing healthy soil for optimal growth in your vegetable garden.

    The Soil Saga: Setting the Stage for Success

    Picture this: your vegetable garden is like a stage, and the soil is the star performer. Without nutrient-rich soil, your veggies might struggle to reach their full potential. So, step one on your gardening journey is to assess the state of your soil. Is it sandy and loose, or dense like clay? Knowing your soil type will help you tailor your approach to nurturing it.

    Unleashing the Power of Compost: Nature’s Superfood for Soil

    Now, let’s talk about compost, aka nature’s superfood for soil. Think of compost as a delicious buffet for your plants, packed with essential nutrients and beneficial microorganisms. By adding compost to your soil, you’re not just feeding your plants; you’re creating a vibrant ecosystem where beneficial bacteria and fungi can thrive. So, grab those kitchen scraps, yard waste, and coffee grounds, and let the composting magic begin!

    Mulch Madness: Keeping Your Soil Cool and Moist

    Ah, mulch – the unsung hero of the gardening world. Not only does mulch add a touch of aesthetic flair to your garden beds, but it also plays a crucial role in soil health. By covering the soil with a layer of mulch, you’re not only keeping weeds at bay but also locking in moisture and regulating soil temperature. Plus, as the mulch breaks down, it adds valuable organic matter to the soil, further enriching it for your precious veggies.

    The Importance of pH Balance: Finding Harmony in Your Garden’s Soil

    Just like humans, plants have their own preferred pH levels for optimal growth. Some veggies like it slightly acidic, while others thrive in more alkaline conditions. So, it’s essential to test your soil’s pH and make any necessary adjustments to ensure that it’s in the sweet spot for your chosen crops. Whether you need to add lime to raise the pH or sulfur to lower it, finding the right balance will set the stage for a successful vegetable garden.

    Germination Essentials: Techniques for healthy sprouts

    Cozying Up: Proper Seed Bed Preparation

    Now, let’s talk about setting the stage for germination success. Your seeds need a cozy, nutrient-rich environment to sprout happily ever after. Prepare a well-draining seed bed, free from pesky weeds and debris. Think of it as creating a comfy nest for your soon-to-be sprout babies.

    Moisture Management: Finding the Goldilocks Zone

    Ah, moisture—the elixir of life for our tiny sprouts. But beware, too much or too little can throw off the delicate balance. Aim for the Goldilocks zone—just the right amount of moisture to keep those seeds hydrated without drowning them. It’s like finding the perfect balance in a yoga pose.

    Patience, Young Grasshopper: The Waiting Game

    Ah, the hardest part of germination: waiting. But fear not, dear gardener, patience is your greatest ally. Resist the urge to disturb the soil or peek under the covers too soon. Trust in the process, like waiting for a cake to rise in the oven—it’ll be worth it in the end.

    Let There Be Light: Sunshine, Sprouts, and Photosynthesis

    Once your sprouts emerge from their cozy beds, it’s time to introduce them to the magic of sunshine. Place them in a sunny spot where they can soak up those glorious rays and kickstart the photosynthesis party. Think of it as giving them a front-row seat to their own growth extravaganza.

    Tender Loving Care: Nurturing Your Baby Sprouts

    Just like newborns, baby sprouts need plenty of TLC to thrive. Keep an eye on moisture levels, fend off any pesky pests, and provide gentle support as they grow. Think of yourself as a proud plant parent, cheering on your sprouts every step of the way.

    Transplanting Tips: Moving Day for Your Sprout Squad

    As your sprouts mature, it’s time for the big move to their permanent garden home. Handle them with care, ensuring minimal root disturbance during transplanting. Think of it as sending your kids off to college—bittersweet, but oh so exciting to see them spread their roots.

    Nurturing Young Plants: Providing optimal care during growth.

    Guide to Growing Vegetables showing plant care

    Choosing the Right Spot

    First things first, let’s talk location, location, location! Just like us, plants have their preferences. Find a spot in your garden that gets plenty of sunlight—about 6 to 8 hours a day is ideal for most veggies. Also, make sure the soil is well-draining and rich in nutrients. Think of it as giving your plants a five-star hotel to call home!

    Starting from Seedlings

    Now that you’ve got your spot picked out, it’s time to introduce your young plants to their new digs. If you’re starting from seedlings, handle them with care. These little guys are delicate, so gently loosen their roots before planting. Remember, they’re like the babies of your garden—fragile but full of potential!

    Water, Water, Everywhere (But Not Too Much)

    Ah, the age-old question: how much water is too much water? It’s a fine balance, my friends. While young plants need regular watering to thrive, soggy soil can lead to root rot—a gardener’s worst nightmare! Stick to a schedule, giving your plants a good drink when the top inch of soil feels dry. And don’t forget to water the base, not the leaves—no one likes soggy feet or wet heads!

    Feeding Time: Hunger Solution

    Just like us after a workout, plants need their nutrients to grow big and strong. Consider adding some organic fertilizer to your garden bed to give your veggies the boost they need. And hey, if you’re feeling extra fancy, why not treat them to some compost? It’s like a gourmet meal for your plants, packed with all the good stuff they crave!

    Keeping the Pests at Bay

    Ah, pests—the uninvited guests of every garden party. But fear not, fellow gardeners, for there are ways to keep these pesky critters at bay! Consider planting companion herbs like basil and mint to deter unwanted visitors. And if all else fails, a homemade garlic spray should do the trick. After all, nothing ruins a veggie garden faster than a hungry bug!

    Patience is a Virtue

    Last but certainly not least, remember to be patient. Rome wasn’t built in a day, and neither is a thriving vegetable garden. Enjoy the journey, relish in the small victories, and don’t sweat the occasional setback. Before you know it, you’ll be harvesting your own homegrown veggies and basking in the satisfaction of a job well done!

    Year-Round Vegetable Gardening Tips and Tricks

    Now that you’re a seasoned vegetable gardener, it’s time to take your skills to the next level with some year-round tips and tricks to keep your garden thriving in every season.

    First things first, embrace the power of succession planting. Rather than planting your entire garden at once, stagger your plantings throughout the season to ensure a continuous harvest. This not only maximizes your yield but also helps prevent a glut of produce all at once.

    Next, don’t overlook the importance of crop rotation. By rotating your crops each season, you can help prevent soil-borne diseases and pests from taking hold while replenishing essential nutrients in the soil. Plus, rotating crops can also help break up pest and disease cycles, keeping your garden healthy and productive year after year.

    Spring: Planting Cool-Season Crops and Starting Seeds

    Ah, spring! The perfect time to dive into your vegetable garden with renewed enthusiasm. As the temperatures begin to rise and the days lengthen, it’s time to get those hands dirty. One of the joys of spring is planting cool-season crops and starting seeds for a bountiful harvest ahead.

    There’s something magical about watching tiny seeds sprout into vibrant seedlings, isn’t there? Whether you’re growing crunchy lettuce, tender spinach, or colorful radishes, spring is the time to get them in the ground. With the threat of frost diminishing, it’s safe to sow these cool-loving veggies directly into your garden beds or containers.

    But wait, there’s more! Don’t forget about starting seeds indoors for warm-season crops like tomatoes, peppers, and eggplants. By getting a head start indoors, you’ll give these heat-loving plants the jump they need to thrive once summer arrives.

    Summer: Managing Heat and Watering Needs for Maximum Growth

    Summer in the vegetable garden can be both exciting and challenging. With the sun beating down and temperatures soaring, it’s essential to stay on top of managing heat and watering needs for your plants’ optimal growth.

    The key to success during the sweltering summer months is proper hydration – for both you and your plants! Make sure to water deeply and consistently, especially during dry spells, to keep your veggies happy and hydrated. Consider investing in a drip irrigation system or soaker hoses to ensure efficient water delivery while conserving this precious resource.

    When it comes to beating the heat, mulch is your best friend. Apply a thick layer of organic mulch, such as straw or shredded leaves, around your plants to help retain moisture in the soil and keep the roots cool. Plus, mulch also suppresses weeds, so you’ll spend less time pulling and more time enjoying your thriving garden.

    Fall: Extending the Harvest with Cold-Hardy Varieties

    As summer fades into fall, it’s time to shift gears in the vegetable garden and embrace the cooler temperatures. But just because the weather is cooling down doesn’t mean your harvest has to come to an end. With cold-hardy varieties, you can extend the bounty well into autumn and beyond.

    Think beyond the traditional summer crops and explore the world of cold-tolerant vegetables like kale, Brussels sprouts, and carrots. These resilient plants can withstand chilly nights and even light frosts, allowing you to continue harvesting fresh produce long after other crops have called it quits.

    To maximize your fall harvest, consider using season extenders like row covers or cold frames to provide additional protection against frost. With a little planning and ingenuity, you can enjoy a continuous supply of homegrown goodness straight from your garden well into the cooler months.

    Winter: Planning and Preparing for the Next Growing Season

    As winter blankets the landscape in a frosty embrace, it’s time to shift your focus from harvesting to planning and preparing for the next growing season. While the vegetable garden may be dormant, there’s plenty to do to ensure a successful and bountiful harvest come spring.

    Start by taking stock of your garden layout and considering any changes or improvements you’d like to make. Maybe you want to expand your raised beds, try out a new trellis system, or experiment with companion planting. Winter is the perfect time to sketch out your plans and dream big for the season ahead.

    Don’t forget about soil health! Use this time to amend your garden beds with compost, aged manure, or other organic matter to enrich the soil and provide essential nutrients for your plants. Healthy soil is the foundation of a thriving garden, so invest the time now, and you’ll reap the rewards later.

    Harvesting and Beyond: Tips for a bountiful yield.

    Guide to Growing Vegetables showing harvesting


    So, you’ve put in the hard work, nurturing those tender seedlings, watching them grow into robust plants in your vegetable garden. Now comes the exciting part: harvesting! But wait, there’s more to it than just plucking your produce. Let me guide you through the art of harvesting and beyond, ensuring a bountiful yield that’ll make your neighbors green with envy!

    Harvesting: Timing is Key

    Timing is everything when it comes to harvesting your vegetables. Each veggie has its own peak harvesting time, so pay attention to the signs. For example, tomatoes should be picked when they’re firm and fully colored, while lettuce is best harvested when the leaves are young and tender. Trust me, there’s nothing quite like the taste of freshly picked veggies from your own garden!

    Gentle Handling for Maximum Flavor

    Handle your harvest with care to preserve its freshness and flavor. Avoid bruising or crushing your vegetables, as this can lead to spoilage. Instead, gently pluck them from the plant using a sharp pair of scissors or pruners. Treat your veggies like delicate treasures, and they’ll reward you with unmatched taste and texture.

    Extend Your Harvest with Succession Planting

    Why settle for a single harvest when you can enjoy a continuous supply of fresh produce? With succession planting, you can stagger your plantings to ensure a steady stream of veggies throughout the growing season. Simply sow new seeds or transplant seedlings every few weeks to fill in the gaps left by harvested crops. It’s like having your own personal grocery store in your backyard!

    Preserve the Bounty: Canning, Freezing, and More

    Don’t let any of your precious harvest go to waste! Preserve your excess produce through various methods like canning, freezing, or pickling. This not only extends the lifespan of your veggies but also allows you to enjoy them long after the growing season is over. Plus, there’s something incredibly satisfying about opening a jar of homemade pickles or a bag of frozen peas in the dead of winter.

    Harvesting Happiness: Share the Bounty

    There’s something incredibly rewarding about sharing the fruits of your labor with others. Whether it’s gifting a basket of fresh veggies to a neighbor or hosting a garden-to-table dinner party, spreading the joy of homegrown produce is a wonderful way to connect with your community. Plus, it’s a great excuse to show off your green thumb and inspire others to start their own vegetable gardens.

    From seed to harvest, cultivating a vegetable garden is a journey of nurturing, patience, and joy. By following this seasonal guide, you can maximize your yield and savor the fruits of your labor. Remember to implement sustainable practices like using Zardens FRP planters, which not only provide a sturdy container for your plants but also promote healthy root growth and water retention. So, whether you’re a seasoned gardener or a novice green thumb, embrace the adventure of growing your own veggies. With a little care and dedication, your garden will flourish, providing you with fresh, flavorful produce all season long.

  • The Secrets of Bonsai: A Journey into Miniature Landscapes

    The Secrets of Bonsai: A Journey into Miniature Landscapes

    Timeless Charm of Bonsai Plants

    Delving into the world of bonsai plants is like embarking on a journey through time and culture. These miniature masterpieces carry within them a rich tapestry of history and symbolism, captivating enthusiasts worldwide. Let’s explore the fascinating origins and enduring significance of these tiny trees and The Secrets of Bonsai.

    Origins: Tracing the Roots of Bonsai

    Bonsai, a Japanese term meaning “planted in a container,” has its roots deeply embedded in Chinese culture. Initially practiced by ancient Chinese scholars as early as the 6th century, bonsai cultivation was seen as a harmonious union of art, nature, and philosophy. Later embraced by the Japanese, bonsai evolved into a distinct art form, reflecting the Zen principles of balance, simplicity, and reverence for nature.

    Symbolism: Unveiling the Meaning Behind the Miniature

    Beyond their aesthetic appeal, bonsai plants carry profound symbolism, each meticulously crafted to convey a specific message or evoke a particular feeling. In Japanese culture, these miniature trees symbolize patience, perseverance, and the beauty of impermanence. Their ability to thrive in confined spaces mirrors the resilience of the human spirit, inspiring contemplation and introspection.

    Cultural Significance: Bonsai in Art, Literature, and Beyond

    Throughout history, bonsai has left an indelible mark on various facets of culture, influencing art, literature, and even popular culture. From ancient scrolls depicting miniature landscapes to modern-day exhibitions showcasing intricate bonsai specimens, these diminutive trees continue to captivate and inspire artists and enthusiasts alike. In literature, bonsai often serves as a metaphor for life’s journey, with its twists and turns mirrored in the intricate pruning and shaping of the tree’s branches.

    The Modern Renaissance: Bonsai in the 21st Century

    In recent years, bonsai cultivation has experienced a renaissance, with enthusiasts from all walks of life rediscovering the joy of nurturing these miniature marvels. From traditionalists adhering to centuries-old techniques to modern innovators experimenting with new styles and species, the world of bonsai is vibrant and ever-evolving. Social media platforms have played a significant role in this resurgence, connecting bonsai enthusiasts worldwide and fostering a sense of community and camaraderie.

    The Mystique: A Beginner’s Journey into Bonsai

    Embarking on the bonsai adventure is like entering a miniature wonderland where trees tell stories through their branches. But before diving into the art of bonsai, let’s unravel the basics, shall we?

    Choosing the Right Tree: Where the Journey Begins

    Selecting the perfect tree for your bonsai journey is akin to finding a lifelong companion. Consider starting with resilient species like junipers or ficus, ideal for beginners. These hardy trees forgive occasional lapses in care, offering room for learning and growth.

    As you browse through nurseries or online shops, trust your instincts. Seek trees with well-defined trunks and pleasing proportions. Remember, your bonsai tree will be your muse, so choose one that speaks to your heart.Creating these miniature masterpieces isn’t just about pruning and shaping; it’s about selecting the perfect plant to cultivate.

    Here, we unveil the top 10 plants for bonsai enthusiasts

    Japanese Maple (Acer palmatum): Renowned for its stunning foliage and graceful branching, the Japanese Maple is a quintessential choice for bonsai. Its delicate leaves turn fiery shades of red, orange, and yellow in autumn, adding a burst of color to any collection.

    Juniper (Juniperus spp.): With its rugged appearance and resilience, the Juniper is a favorite among bonsai practitioners. Its evergreen foliage and gnarled trunk evoke a sense of ancient wisdom, making it an ideal candidate for creating dramatic, windswept designs.
    The Secrets of Bonsai

    Chinese Elm (Ulmus parvifolia): As one of the most adaptable and forgiving species, the Chinese Elm is perfect for beginners and seasoned bonsai artists alike. Its small, glossy leaves and intricate bark lend themselves well to various styles, from formal upright to cascade.

    Ficus (Ficus spp.): Whether it’s the Ficus Retusa or Ficus Microcarpa, these tropical trees are beloved for their lush foliage and aerial root systems. With proper care, Ficus bonsai can thrive indoors, bringing a touch of the exotic into any living space.
    The Secrets of Bonsai

    Trident Maple (Acer buergerianum): Prized for its brilliant autumn colors and distinctive three-lobed leaves, the Trident Maple is a treasure in the world of bonsai. Its elegant silhouette and fine ramification make it a favorite for creating refined, miniature landscapes.

    Pine (Pinus spp.): For those seeking a challenge, Pine bonsai offer a rewarding journey. From the rugged Scots Pine to the elegant Japanese Black Pine, these conifers require patience and skill to coax into the classic bonsai form, but the results are truly breathtaking.
    The Secrets of Bonsai

    Satsuki Azalea (Rhododendron indicum): Celebrated for their vibrant blooms and compact growth habits, Satsuki Azaleas are a feast for the senses in bonsai form. With proper pruning and wiring, these miniature marvels can showcase a profusion of color year after year.

    Boxwood (Buxus spp.): Known for their dense foliage and ability to withstand heavy pruning, Boxwoods are ideal for creating dense, compact bonsai designs. Their small leaves and fine branches lend themselves well to formal styles like the broom and the cloud.
    The Secrets of Bonsai

    Japanese Black Pine (Pinus thunbergii): Revered for their rugged beauty and symbolic significance, Japanese Black Pines are a staple in traditional bonsai culture. Their rugged bark, twisted trunks, and deep green needles evoke a sense of strength and resilience.

    Japanese White Pine (Pinus parviflora): With its graceful form and delicate needles, the Japanese White Pine embodies the timeless elegance of bonsai. Whether styled as a formal upright or cascading masterpiece, this species exudes serenity and tranquility.
    The Secrets of Bonsai

    The Toolbox: A Bonsai Gardener’s Best Friends

    The Secrets of Bonsai toolbox

    Embarking on a journey into the enchanting world of bonsai gardening? Hold onto your pruning shears because we’re diving deep into the essential tools every bonsai enthusiast needs to cultivate their tiny arboreal masterpieces. From the humble soil beneath your bonsai’s roots to the precision scissors that shape its branches, let’s explore the must-haves for your bonsai toolkit.

    1. Soil Selection: The Foundation of Bonsai Brilliance

    Picture this: your bonsai is a skyscraper, and the soil is its bedrock foundation. Just as a sturdy base ensures a towering building’s stability, the right soil mix is paramount for your bonsai’s health and growth. Opt for well-draining soil blends tailored to your tree’s species, providing the perfect balance of aeration and moisture retention. Say goodbye to soggy roots and hello to thriving foliage!

    2. Pruning Tools: Crafting Nature’s Canvas

    Ah, the art of bonsai pruning—a delicate dance between precision and creativity. Enter stage left: your trusty pruning tools. From scissors to shears, these handheld wonders are your ticket to sculpting your bonsai’s silhouette with finesse. Remember, less is often more in the world of bonsai, so wield your tools with a gentle touch and a keen eye for balance. With each snip and clip, you’re not just shaping a tree—you’re shaping a masterpiece.

    3. Watering Essentials: Quenching Nature’s Thirst

    Water, the elixir of life for your bonsai companion. But beware: too much or too little can spell disaster for your miniature marvel. Equip yourself with a watering can or mister to deliver hydration with precision, ensuring every drop reaches its intended destination. Pay heed to your bonsai’s individual needs, adjusting your watering schedule based on factors like season, humidity, and soil moisture. With a splash here and a sprinkle there, you’ll keep your bonsai happy and hydrated for years to come.

    4. Wiring Wizardry: Crafting Shapes with Finesse

    Ever dreamed of bending nature to your will? Enter the world of bonsai wiring, where artistry meets horticulture in a dance of elegant manipulation. Armed with aluminum or copper wire, you have the power to guide your bonsai’s branches with grace and precision, coaxing them into sinuous curves or dramatic cascades. But tread lightly, dear gardener, for too much force can lead to injury. Practice patience and finesse as you weave your bonsai’s destiny one twist at a time.

    5. Fertilizer Finesse: Nourishing Growth from Within

    Just like a balanced diet fuels your body, the right fertilizer nourishes your bonsai from root to tip. Choose a fertilizer formulated specifically for bonsai cultivation, rich in essential nutrients like nitrogen, phosphorus, and potassium. With regular applications during the growing season, you’ll fuel robust growth and vibrant foliage, transforming your bonsai into a verdant work of living art. Remember, moderation is key—too much fertilizer can overwhelm your bonsai’s delicate roots, so err on the side of caution as you feed your miniature masterpiece.

    6. Sheltering Shields: Protecting Your Bonsai from the Elements

    Mother Nature can be both friend and foe to your bonsai garden, with her whimsical weather patterns and unpredictable pests. Arm yourself with protective shields like frost cloth or insect netting to safeguard your bonsai from nature’s tantrums. Whether it’s shielding delicate foliage from frosty winds or warding off pesky pests, these simple yet effective defenses ensure your bonsai’s well-being year-round. With a little foresight and preparation, you’ll weather any storm that comes your way, emerging victorious with your bonsai garden intact.

    Bonsai Care : Year-Round Maintenance

    Bonsai trees are like tiny pieces of nature’s artwork, requiring a delicate touch and attentive care throughout the year. Each season brings its own set of challenges and opportunities for nurturing these miniature marvels. Whether you’re a seasoned bonsai enthusiast or just starting out on your green-thumb journey, understanding how to care for your bonsai in every season is essential for its health and longevity. Let’s dive into some tips to keep your bonsai thriving year-round!

    The Secrets of Bonsai plant care

    Spring Spruce-Up: Refreshing Your Bonsai

    As the world awakens from its winter slumber, so too do bonsai trees spring back to life with renewed vigor. Spring is a time of growth and renewal for bonsai, making it the perfect opportunity to refresh your tree’s appearance and set the stage for a flourishing season ahead. Start by inspecting your bonsai for any signs of winter damage or disease, trimming away dead or diseased branches with sharp, clean pruning shears. Next, repot your bonsai if it has outgrown its current container, using fresh soil to replenish nutrients and promote healthy root growth. Finally, fertilize your bonsai with a balanced fertilizer to give it the boost it needs to thrive in the coming months.

    Summer Sun: Shielding Your Bonsai from Heat Stress

    As temperatures rise and the sun beats down, it’s important to protect your bonsai from the scorching summer heat. Position your bonsai in a location where it will receive filtered sunlight during the hottest parts of the day, such as under a shade tree or on a covered porch. Water your bonsai regularly, keeping the soil evenly moist but not waterlogged, and mist the leaves with a fine spray of water to increase humidity and prevent them from drying out. If you live in a particularly hot climate, consider placing a layer of mulch around the base of your bonsai to help retain moisture and regulate soil temperature.

    Fall Foliage: Preparing Your Bonsai for Winter

    As autumn leaves begin to fall, it’s time to start preparing your bonsai for the colder months ahead. Begin by gradually reducing the frequency of watering and fertilizing your bonsai as it enters its dormant phase. This will help prevent new growth from being damaged by frost and conserve energy for the winter ahead. Inspect your bonsai for any pests or diseases that may have taken up residence over the summer months, treating them promptly with organic pesticides or fungicides as needed. Finally, protect your bonsai from freezing temperatures by bringing it indoors or placing it in a sheltered location such as a garage or greenhouse.

    Winter Wellness: Providing TLC During the Cold Months

    Winter can be a challenging time for bonsai, with cold temperatures and reduced sunlight putting stress on your tree’s delicate ecosystem. To help your bonsai weather the winter months, keep it in a cool but frost-free location where it will receive plenty of indirect sunlight. Water your bonsai sparingly, being careful not to let the soil dry out completely between waterings. If your bonsai is kept indoors, consider placing it near a humidifier to help maintain optimal humidity levels. During periods of extreme cold, protect your bonsai from frost damage by wrapping the pot in insulation or placing it inside a protective cover. With a little extra care and attention, your bonsai will emerge from winter ready to greet the spring with renewed vitality.

    Choosing the Right FRP Planter : Style and Functionality

    So, you’ve decided to jazz up your space with some fabulous FRP planters. But wait, before you dive headfirst into the world of fiberglass-reinforced plastic, let’s talk style and functionality. After all, you want your plant babies to thrive in a container that’s not only chic but also practical, right? Let’s break it down.

    Finding Your Style

    When it comes to style, FRP planters offer a smorgasbord of options. From sleek and modern to rustic and charming, there’s a planter out there to suit every taste. Think about the aesthetic of your space—are you going for a minimalist vibe or something more eclectic? Consider the colors, shapes, and textures that will complement your decor and bring your vision to life. Whether you’re envisioning a row of geometric planters lining your patio or a statement piece for your living room, let your imagination run wild.

    Balancing Form and Function

    While style is important, functionality should never be overlooked. After all, your plant’s health depends on it! When choosing an FRP planter, consider factors like drainage, size, and durability. Opt for planters with drainage holes to prevent waterlogged soil and root rot—your plants will thank you later. Additionally, think about the size of your plant’s root system and choose a planter with enough room to accommodate its growth. And don’t forget about durability—look for planters that can withstand the elements if you’ll be placing them outdoors. A little rain or shine shouldn’t cramp your plant’s style!

    Practical Considerations

    Now, let’s get down to brass tacks. When selecting an FRP planter, think about the practicalities of maintenance and upkeep. Are you a green thumb guru with time to spare for regular watering and repotting? Or do you need something low-maintenance that can thrive with minimal attention? Consider factors like material weight, ease of cleaning, and UV resistance. Lightweight planters are great for maneuverability, while UV-resistant coatings can help protect against sun damage. And if you’re a busy bee, self-watering systems or built-in reservoirs can help keep your plants hydrated while you’re off living your best life.

    Incorporating Your Personal Touch

    Last but certainly not least, don’t forget to inject a little bit of your personality into your planters. Whether it’s adding decorative accents like pebbles or moss, or customizing with paint or decals, there are countless ways to make your planters uniquely yours. Get creative and have fun with it! After all, your planters should reflect your style and personality just as much as the plants they house. So go ahead, let your inner plant parent shine!

    Transform Your Space with These 7 Bonsai Décor Ideas

    Bonsai trees aren’t just plants; they’re living works of art that can breathe life into any space. Whether you’re a seasoned bonsai enthusiast or just dipping your toes into the art form, there are endless ways to incorporate these miniature marvels into your home décor. Let’s explore seven creative and delightful ways to elevate your space with the beauty of bonsai.

    The Secrets of Bonsai  decoration

    1. Bonsai Centerpieces: Bringing Nature to Your Table

    Why settle for ordinary table centerpieces when you can dazzle your guests with bonsai beauty? Imagine a sleek tabletop FRP planter adorned with a miniature masterpiece, adding a touch of serenity to your dining experience. Whether it’s a formal dinner party or a cozy family gathering, a bonsai centerpiece is sure to spark conversation and admiration.

    2. Bonsai Terrariums: Miniature Worlds of Wonder

    Step into a world of enchantment with bonsai terrariums. Utilizing a tabletop FRP planter, create your own tiny ecosystem by combining bonsai trees with moss, rocks, and other miniature plants. These living dioramas not only add visual interest to any space but also provide a serene escape into nature, right in the comfort of your home.

    3. Bonsai Wall Art: Elevate Your Vertical Space

    Why limit your décor to horizontal surfaces when you can elevate it—literally? Transform your walls into living galleries with bonsai wall art. Utilize hanging FRP planters to showcase your miniature masterpieces in a vertical arrangement, adding depth and dimension to any room. Whether it’s a single statement piece or a series of cascading bonsai, your walls will thank you for the green makeover.

    4. Bonsai Zen Gardens: Cultivate Tranquility

    Seeking inner peace? Look no further than a bonsai zen garden. Create your own oasis of calm by incorporating bonsai trees into a traditional Japanese-inspired garden. Utilize a tabletop FRP planter as the focal point, surrounding it with sand, rocks, and miniature accessories to evoke a sense of serenity and balance. Whether placed on a desk or a meditation altar, your bonsai zen garden will serve as a gentle reminder to pause, breathe, and find peace in the present moment.

    5. Bonsai Bookends: Where Function Meets Beauty

    Why settle for ordinary bookends when you can add a touch of greenery to your literary collection? Utilize miniature bonsai trees as living bookends, framing your favorite volumes with natural beauty. Place them on a shelf or a tabletop, using FRP planters to anchor your books in style. Not only do bonsai bookends add visual interest to your space, but they also bring a breath of fresh air to your reading nook.

    6. Bonsai Fairy Gardens: Whimsical Delights for All Ages

    Let your imagination take flight with bonsai fairy gardens. Create enchanting miniature worlds where bonsai trees serve as the towering giants of a whimsical landscape. Use a tabletop FRP planter as the foundation, filling it with moss, tiny figurines, and miniature accessories to bring your fairy tale to life. Whether it’s a secret garden tucked away in a corner or a whimsical centerpiece for your coffee table, bonsai fairy gardens are sure to spark joy and wonder for all ages.

    7. Bonsai Accent Lighting: Illuminate with Elegance

    Why settle for ordinary lighting when you can illuminate your space with bonsai beauty? Incorporate bonsai trees into your lighting fixtures for a truly unique and elegant touch. Utilize a tabletop FRP planter as the base, surrounding it with LED lights to create a soft, ethereal glow. Whether used as bedside lamps or statement pieces in your living room, bonsai accent lighting adds a touch of magic to any space, transforming it into a luminous sanctuary of style and serenity.

    Embracing the Beauty of Bonsai

    In a world where trends come and go like fleeting seasons, there’s something reassuring about the timeless allure of bonsai. These miniature marvels embody centuries of patience, craftsmanship, and reverence for nature’s elegance. Each twist of the trunk, every delicate leaf, whispers stories of resilience and harmony. Embracing bonsai isn’t just about cultivating plants; it’s a journey into the soul of horticulture, where art and science dance in perfect harmony. With bonsai, time slows down, allowing us to savor the beauty of the moment and appreciate the profound wisdom that comes with nurturing something so ancient yet evergreen with The Secrets of Bonsai

    Zardens Fiberglass Planters, a perfact match for all Bonsai lovers, choose your Planters. – Zardens.com

Bulk Enquiry